
If you’ve ever had to redesign a live WordPress site, then you know the challenges involved.
Instead of shutting down the Live Site for the period, it takes for the redesign, it’s often a good idea to put up a development site (or a “Dev Site”) in a subfolder or a subdirectory, work on the redesign there, and then move it to the root domain and replace the Live Site.
There are a number of different ways to move from a subfolder or subdirectory to the root domain. Below we’ll go over the process for doing that.
This process is both easy and safe. If anything happens to go wrong, you can quickly get the original site back up and running.
Since most people running a WordPress site deal with a web host that gives access to things such as Cpanel and phpMyAdmin, we will be using those to complete this process.
There’s no need to run an independent FTP program for this process.
1. Back Up Database
The first thing you’ll want to do is to back up your original database in case you need to restore everything back to the way it was.
As you will be downloading a number of different databases in this process, it’s a good idea to put each one into a different folder with a very descriptive name so that you will know which is which later on.
Process:
Access your Cpanel for your Live Site (we’ll refer to this as “livesite.com”). You can get there by going to livesite.com/cpanel.
Find the Backups icon and click on that.
![]()
Click on your database name to download it. Save it to your computer.
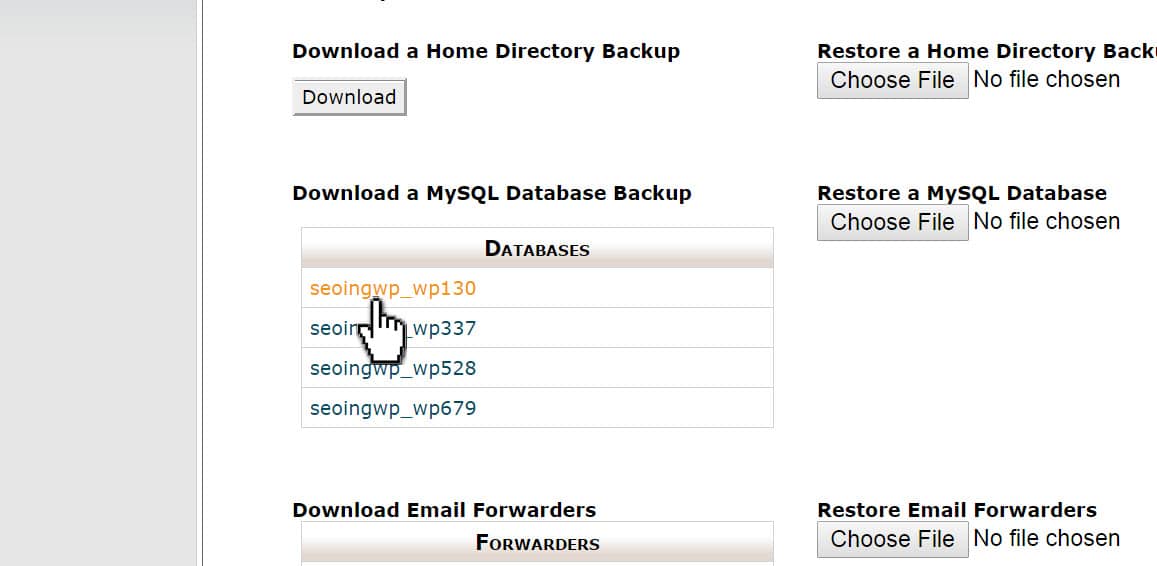
Note: If you have multiple databases, then find the one for the Live Site by going to your files via your File Manager in Cpanel. Look for the wp-config file. Click on the button to edit it, and look for the name of your database near the top of the file.
2. Create a Dev Site
Create a development site that you can work on in a subfolder (livesite.com/dev) or in a subdirectory (dev.livesite.com) by installing a new version of WordPress in the subfolder or subdirectory.
I will be using a subfolder for this example, and so I will just refer to the subfolder from now on.
IMPORTANT: When you create a new site, use the same login info as on the Live Site.
3. Delete wp-content Folder on Dev Site
Once you have your Dev Site set up (livesite.com/dev), go into the files for that site on your server by using Cpanel > File Manager.
Delete your wp-content folder for the Dev Site.

4. Copy wp-content Folder from Live Site
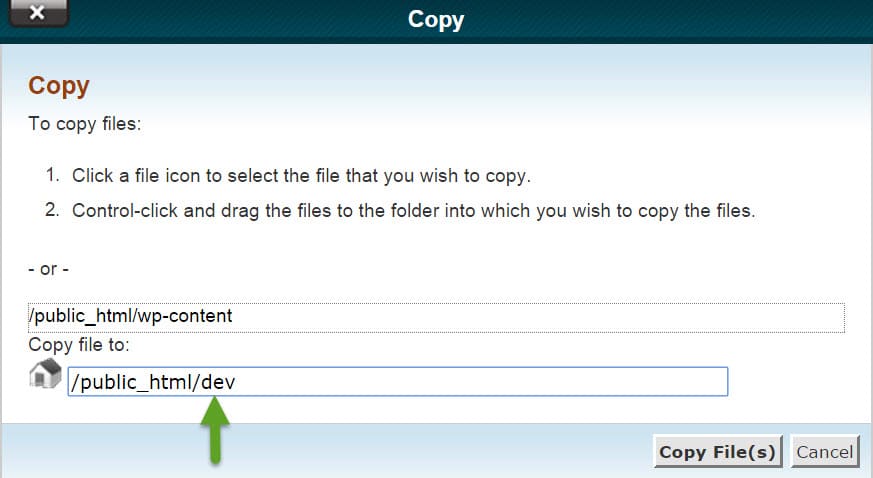
Next, go to the files for the Live Site (livesite.com), and COPY the wp-content folder from that site to the Dev Site.
The wp-content folder has all your themes, plugins, and media in it. So you are just bringing all that from your Live Site to your Dev Site.

When you click the button to copy the folder, a box will pop up. You will need to add “dev” (or the name of the folder where your development site is if you named it something other than dev).
5. Install WP Migrate DB Plugin
Next, we’ll jump out of the server files and go to the admin areas of both the Live Site (livesite.com) and the development site (livesite.com/dev).
Install the WP Migrate DB plugin on both of these sites.
6. Copy Live Site’s Database
Use the migration plugin to copy the Live Site's database and save it to your computer.
There are instructions for how to do this in the video on the plugin’s homepage.
We’ll post that video here, but it may change in the future, so just make sure to check out the plugin’s page for the latest instructions.
https://www.youtube.com/watch?v=m8oScnEK5y0
7. Upload Live Site’s Database to Dev Site
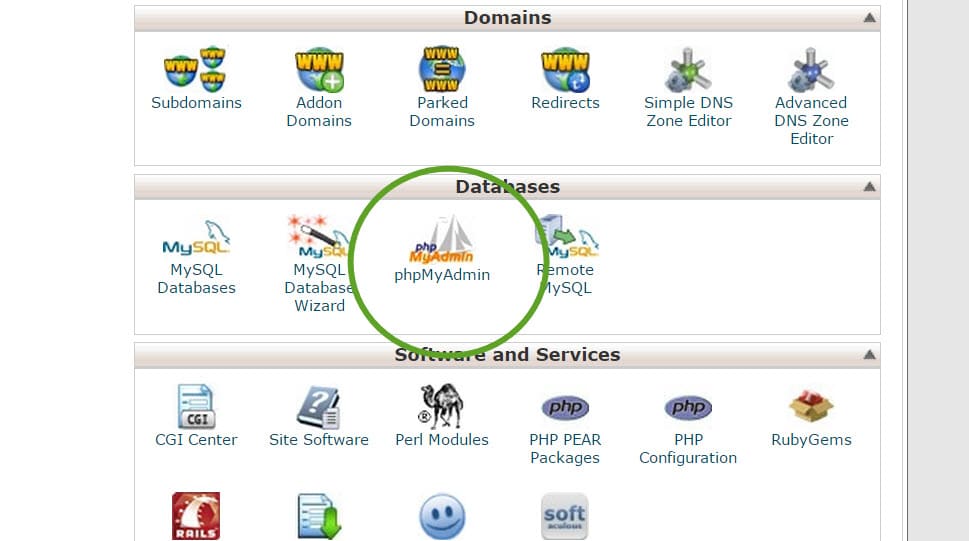
Upload the Live Site's database to the Dev Site using PHPmyadmin.
Once again, instructions for how to do that are covered in the video above.
You can get to your phpMyAdmin via your Cpanel (livesite.com/cpanel)
8. Work on Dev Site
At this point, your Dev Site should look exactly like your Live Site.
You can now work on it as you like, redesigning or changing whatever you need to change.
9. Copy Dev Site's Database
Once you’re finished working on the Dev Site, use the migration plugin again to copy the Dev Site's database and save it to your computer.
This process is just like the process you performed before, only you do it in reverse (Dev Site > Live Site). Follow the instructions in the video.
10. Replace Live Site’s Database
Just as you replaced the Dev Site’s database with the Live Site’s database before, now you will do the reverse and replace the Live Site’s database with the Dev Site’s database using phpMyAdmin.
NOTE: If you add content to the Live Site after copying its database to the Dev Site, remember that the new content will not appear on the Dev Site, and it will also get overwritten when you replace the Live Site's database with the Dev Site's database.
As there are too many possible scenarios here to go into how you might deal with that, just keep it in mind and deal with it as you see fit.
11. Rename wp-content Folder on Live Site
Now we will go back into the files on the server via the File Manager in Cpanel.
Find the wp-content folder in the files for your Live Site (in the root), and rename that to something like “wp-content-original.” This is a precautionary measure in case you need to restore the original files.
12. Copy wp-content Folder from Dev Site
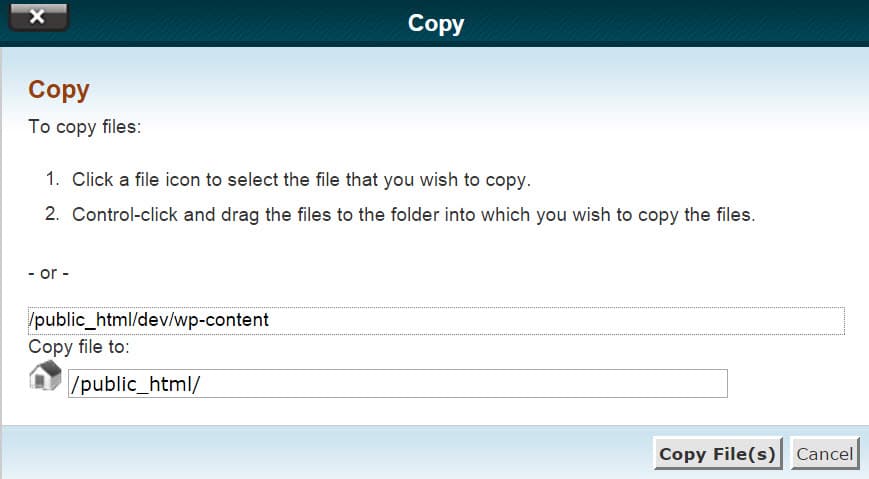
Next, go to your server files for your Dev Site and COPY the wp-content folder to the Live Site’s files (on the root)
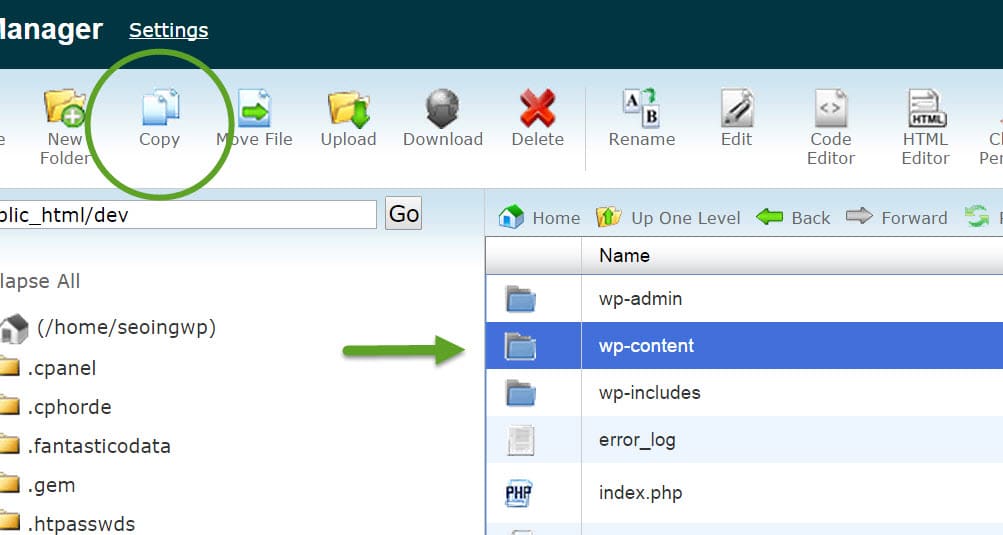
When the box pops up, you need to copy it to the root domain by deleting the “dev” part (or whatever you’ve named your development site’s folder)
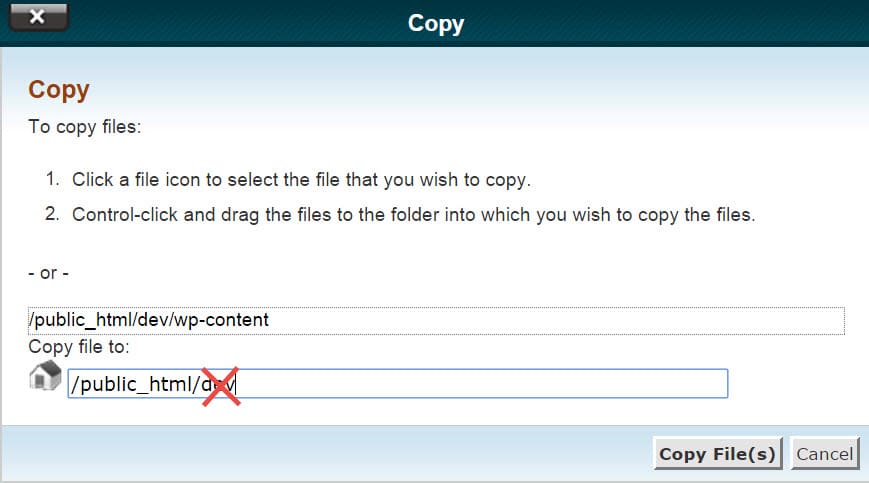
You should move it to just the public_html folder.
13. Reactivate Plugins
Your new site should now be up and running on your root domain (livesite.com). You may, however, need to go in and reactive some plugins.
14. How to Restore Original Site if Problems Occur
If something happened and the new site is having problems, delete the new wp-content folder you made on the root domain and rename the wp-content-original folder to wp-content. Then restore your original database (the one you made at the very beginning of the process) by going into your phpMyAdmin area and using the import process as you did before.
If you have no problems, you can (and should) delete the original wp-content folder from the Live Site (i.e. the folder that is now named “wp-content-original”). Eventually the plugins there will get old and they may become a security risk because you will not be updating them.
A Relatively Easy and Safe Process
And that’s it. While there’s a little work involved, the migration plugin certainly makes things easier than if you were to do this manually. And if you take the recommended precautions by backing up your original database and keeping your original wp-content folder for a short time, then you can always get things back to the way they were before you started.
No Comments Yet