You’ve probably been on a website before, clicked on a link, and instead of it taking you to another page, it simply took you to a different spot on the page.
Or perhaps you’ve clicked on a link and it did take you to another page (or another site), but it didn’t put you at the top of the page. Instead, it put you at the top of a section somewhere down on the page.
These types of links are called page jumps, and in this post, we’re going to go over how you can get them in WordPress.
Two Basic Parts
There are two basic parts to a page jump:
- The link
- The target
The link, of course, is the link that you click on. And the target is the spot where you end up on the page.
A link for page jump looks like this:
<a href="#1970s">The 1970’s</a>
The target looks like this:
<a name="1970s"></a>
You’ll notice that in the href spot there is a hashtag (#) and then an identifier (1970s).
In the target, there is no hashtag, but the identifier (1970s) is the same as in the link.
In the target, you can have words in between the “a” codes if you like, but it’s not necessary.
For example, these two targets are the same for all intents and purposes. A link pointed to them will go to where that target code begins.
<a name="1970s">The Decade of the 1970s</a>
<a name="1970s"></a>
Easy Creation in WordPress
In WordPress, it’s pretty easy to create such page jumps.
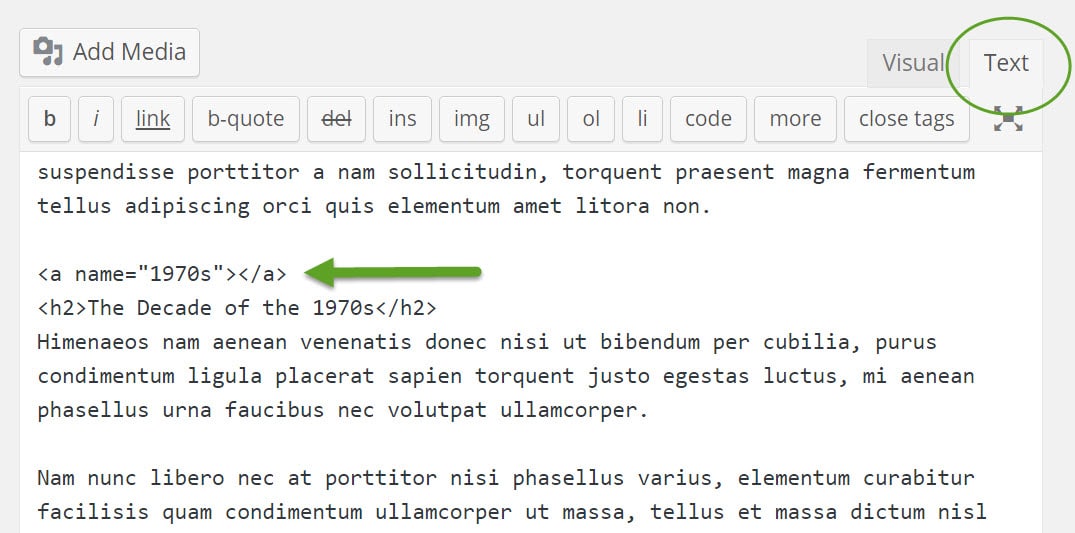
Simply go into the code (i.e. “Text”) panel of your editor, and then create a TARGET where you would like the link to jump to.
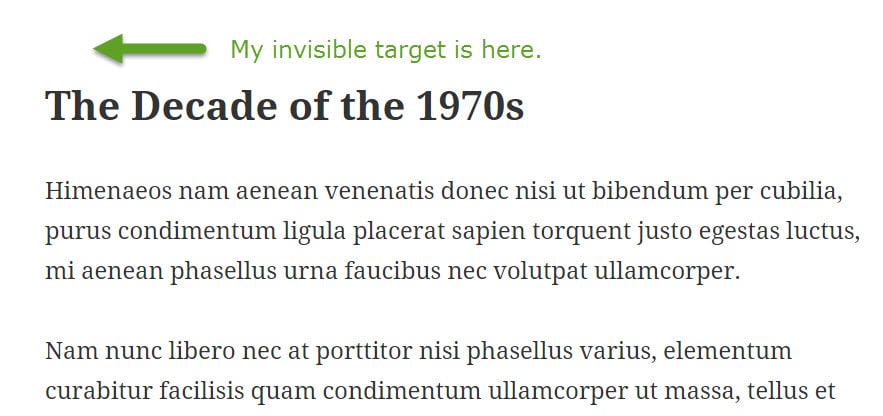
In my example, I’m going to put it just above the title of a section on my page called “The Decade of the 1970s.”
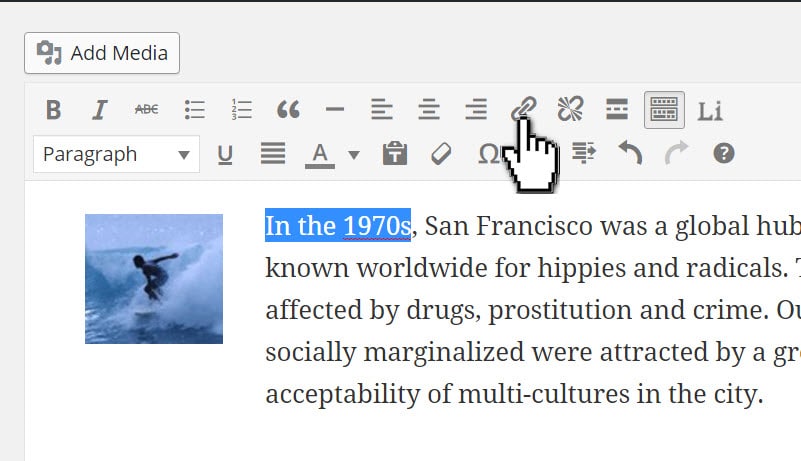
Next, while you could insert the code for the link in this same window, it’s easier if you switch back to the visual mode of your editor, then select the text (or image) you’d like to link and click the link icon as if you were making a regular link.
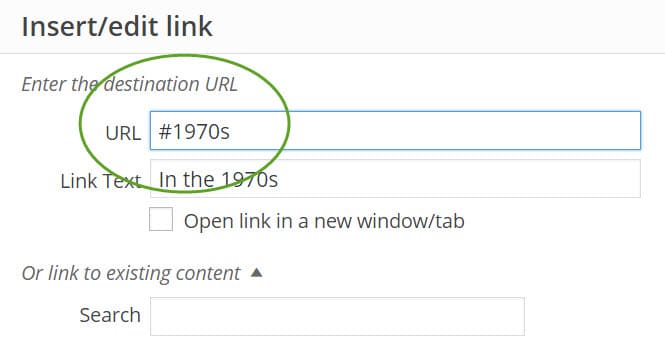
Instead of putting in a URL, however, you’re going to put in the same target word that you put into your target code, EXCEPT you have to remember to add the hashtag before it.
In my example, mine was “1970s,” so I’m going to put in #1970s. Then just save the link as you normally would.
And then here’s where that link now jumps to – just above my section titled “The Decade of the 1970s.”
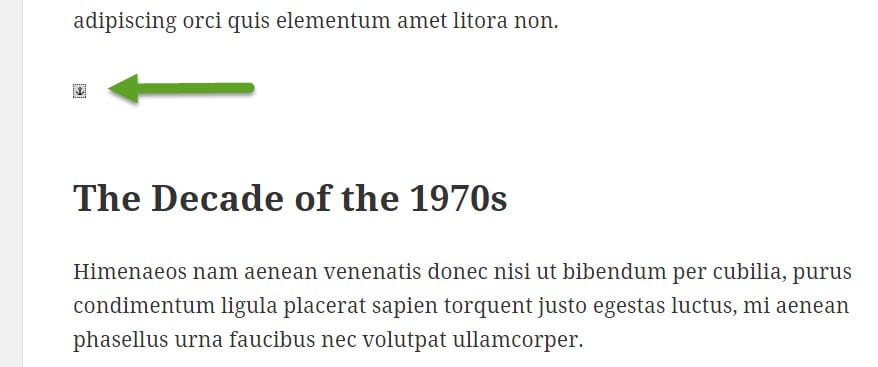
By the way, when you’re in your visual editor, you should be able to see a tiny little link icon to show you where your target is.
Jumping to the Spot on the Page
When you click the link you’ve made and jump to the spot on the page that you want, you want to make sure that nothing gets cut off at the top of your page.
That’s why I chose to put my target ABOVE in the title of my section instead of wrapping the target code around my title.
In other words, I chose to do it like this:
<a name="1970s"></a>

<h2>The Decade of the 1970s</h2>
Instead of like this:
<a name="1970s"><h2>The Decade of the 1970s</h2></a>
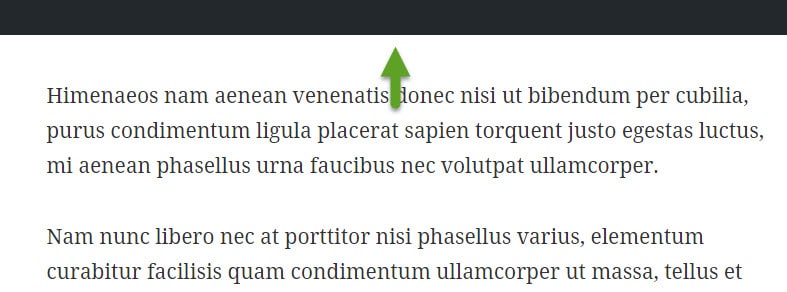
In WordPress, when you’re logged into your site (as you’ll have to be to create links), then you will get a black bar running across the top of your page. And so when you check your link, there’s a good chance that it will look like something is cut off.
For example, in the image below, you can’t see the title of my section, “The Decade of the 1970s.”
Just know, however, that your site’s visitors won’t have that black bar (unless they’re logged in for some reason), and so it should look fine to them, like the following.
You can easily see what it will look like for your visitors by logging out or using an incognito window.
Link to Different Pages
Above we talked about linking to another spot on the same page. But you can also link to a specific spot in a different.
The way to do that is to just put # and the target word at the end of that page’s URL.
For example, if the link to my section about the 1970s was on a page with the following URL
example.com/the-different-decades/
Then to link directly to the 1970s section on that page, I would use the following URL:
example.com/the-different-decades/#1970s
In fact, once you click on a page jump link, you will see such a link in the browser.


No Comments Yet