
WordPress Multisite is a hidden feature in WordPress that allows you to turn your single site into a network of sites along the lines of wordpress.com.
In other words, you can have your original site, e.g. mysite.com. But then you can have completely different WordPress installs connected to it, all with their own themes and plugins if you like. However, the whole network is controlled by a Super Administrator.
As the Super Administrator, you have the ability to easily update all sites at once and control which sites can use which themes and plugins, etc.
As mentioned, however, this feature is hidden in WordPress, and so you can’t just flip it on with a click of a button.
There’s a short process involved in turning it on, and so we’ll go through how to do that below.
*Note: You will need access to your server to complete this process. As most people using WordPress work with Cpanel, that is what we will be using in the example below.
Before Beginning the Process
Before beginning the process, there are a few things you should do.
1. Subfolders vs. Subdomains
The first is to decide whether you want your network of sites to appear in subfolders or on subdomains.
Sites in subfolders would look like this:
Main site: mysite.com
Network Sites: mysite.com/greensite, mysite.com/bluesite, mysite.com/redsite, etc.
Sites on subdomains would look like this:
Main site: mysite.com
Network Sites: greensite.mysite.com, bluesite.mysite.com, redsite.mysite.com, etc.
You can go either way. In the past, there *may* have been a slight SEO advantage to using subfolders, but I’m not sure if that’s true anymore. For most people, it’s just about how they want their URLs to look.
mysite.com/bluesite/example-post
vs.
bluesite.mysite.com/example-post
Subfolders obviously look more integrated into the main site.
2. Permalinks
Make sure you have “pretty permalinks” turned on (Settings > Permalinks). These days they get turned on by default, but you might want to double-check that.
In other words, your URLs should look something like mysite.com/example-post and not mysite.com/?p=157
3. Deactivate Plugins
Deactivate all your plugins before beginning the process.
Ok, let’s get on with the process.
Step 1: Adding Code to Config File
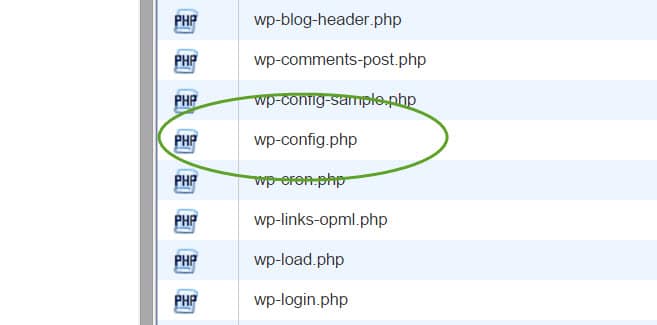
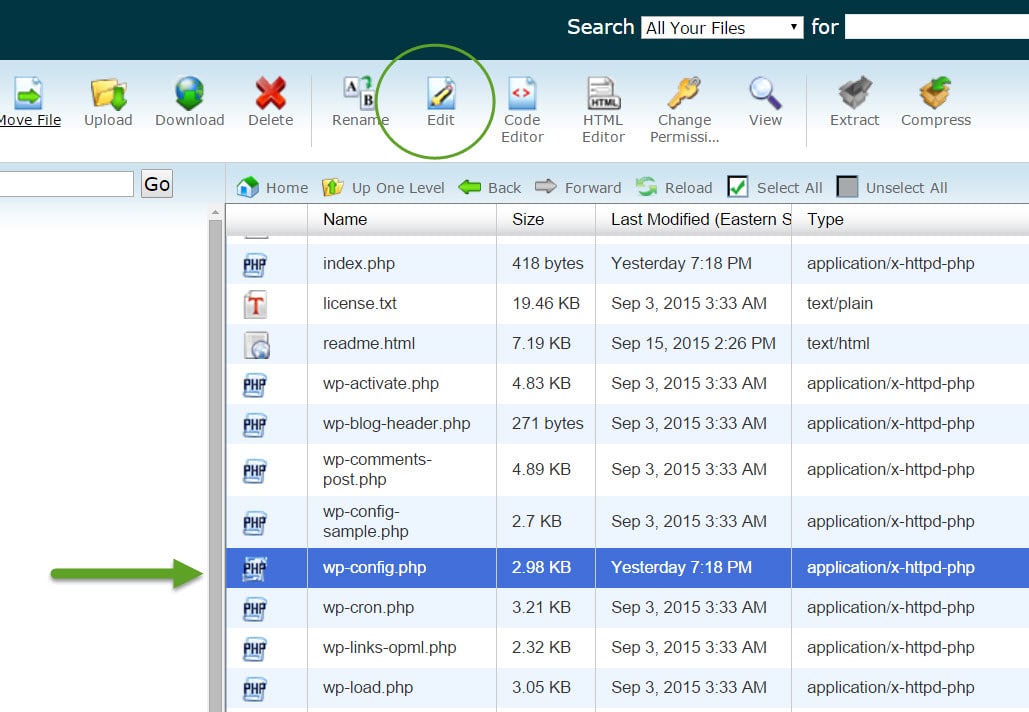
The first step is to navigate to your wp-config.php file on your server. It will be in the root section of your WordPress install.
Edit that file.
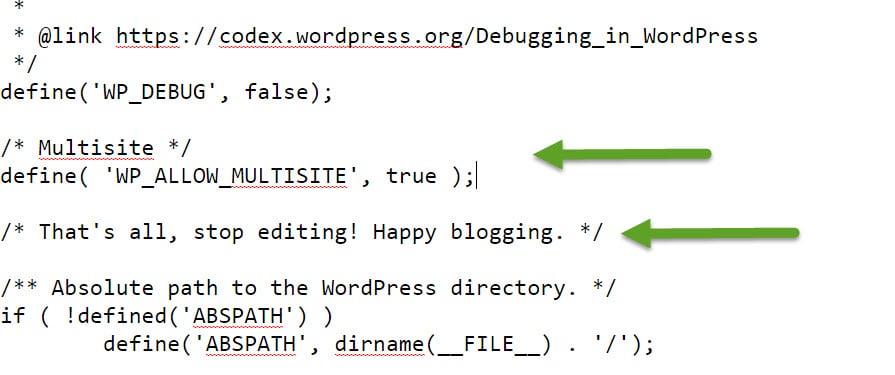
Find the line that says the following:
/* That's all, stop editing! Happy blogging. */
And then place the following code ABOVE that line. Then save the file.
/* Multisite */
define( 'WP_ALLOW_MULTISITE', true );
Step 2: Network Setup
Go back to the admin area of your site and refresh your browser.
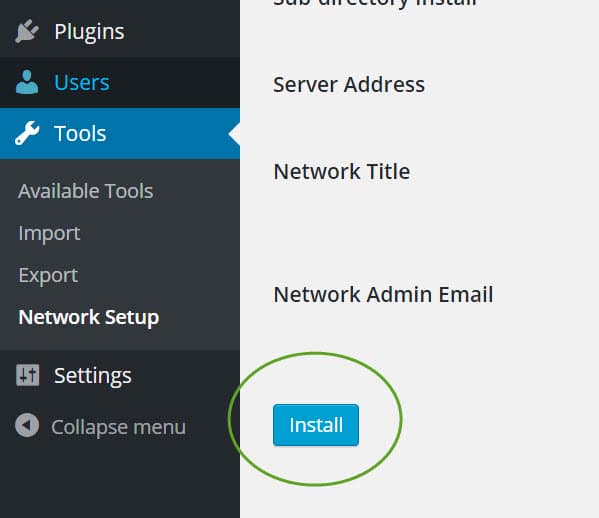
After refreshing, you will now see an option for “Network Setup” under your Tools section.
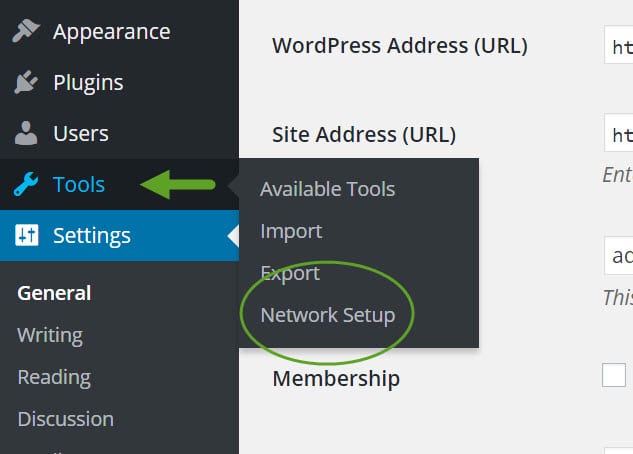
When you click that, on the next page you’ll see the option for subdomains or subfolders as discussed before.
If your site is NOT relatively new, then you will be forced to use subdomains and you won’t have a choice.
If you are installing a Multisite Network on a site that is already in a subfolder (e.g. mysite.com/mynetworksite/), then you will be forced to use subfolders.
In any case, you will see an “Install” button on that page. Click that when you’re ready.
Step 3: Add More Code to Config File
When you hit the Install button, it will take you to a new page with some instructions.
It will give you some more code to add to your wp-config.php file, once again, above the line that says the following:
/* That’s all, stop editing! Happy blogging. */
Step 4: Add code to .htaccess File
On that same page, it will give you some more code to put into your .htaccess file.
This code should REPLACE the code that’s currently in your .htaccess file.
*Note: If you don’t see a .htaccess file on your server, then make sure you are checking the box that allows you to see hidden files when you first enter your File Manager in Cpanel.
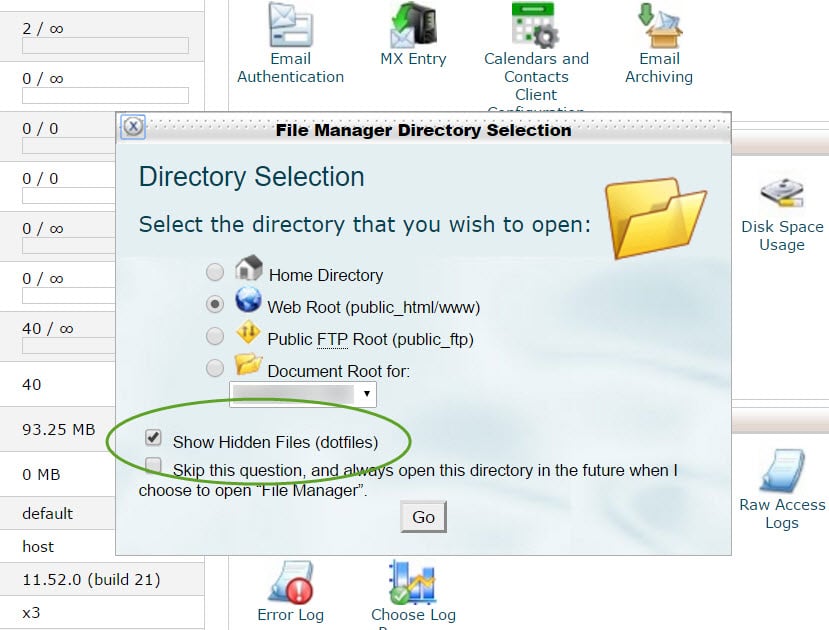
If you still don’t see a .htaccess file, then you can simply create one. Just find the button at the top of your page in Cpanel to create a new file, and name it .htaccess (don’t forget the . at the beginning).
Once you complete the above, you will need to log in again to your site.
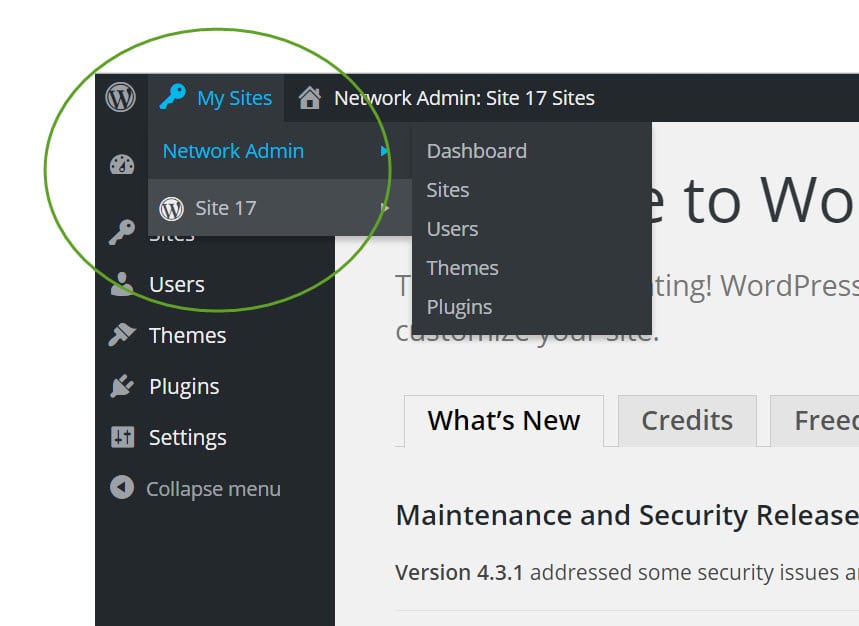
Network Enabled
When you’ve logged back in, you will now see that it says “My Sites” at the top left in your admin area instead of “My Blog.”
You are now the Super Administrator, and so the default dashboard for you is now a place to control all of your sites, not just your one blog.
To post on the blog for the main site, you will need to navigate to that site’s dashboard.
You can then explore Multisite from there. Adding sites, adding themes and plugins for the network, and more.
No Comments Yet