

Since it was retired from my current web host – Hostgator, I have been installing WordPress manually since the alternatives are not the best. I am going to show you how to install WordPress on any web host manually.
This can be a good way to install WordPress since you have control of every process. You create a database with your preferred name; you crate your preferred usernames and passwords. Some automatic web host WordPress installers will create the database and passwords automatically.
Installing WordPress Manually on a Web host
You can use two methods to install WordPress manually on the web host, you can either:
Install WordPress Manually via Cpanel
Install WordPress Manually via FTP
Let us look in detail at each of these options. First, we will start with installing WordPress manually on the web host via the Cpanel.
Install WordPress Manually via Cpanel
You can install WordPress manually on your web host by following the following five steps. Please ensure you take care not to overrun an existing WordPress installation on your domain. For this tutorial, I will be installing WordPress on a subdirectory in my parent domain.
1) Download and upload WordPress
The first step is to download a copy of the latest version of WordPress and upload it to your Web host. You first need to log in to your web host through the control panel and create a directory on where you want to install WordPress. For the case of this tutorial, the directory of WordPress installation is
http://njengah.com/tutorial

If you are installing in a domain, identity the domain site folder. If you added the domain and the DNS is set the respective site folder should be located in a path like this one: public_html/yoursite.com. Open this folder and upload the WordPress zip file there. To upload WordPress click on the upload icon and select the zip file from your desktop. When WordPress upload is complete you should extract all the files in this folder and delete the zip file. After downloading and uploading WordPress successfully to your site folder it is now time to create your site database.
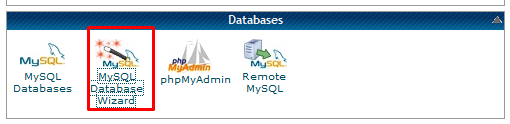
2) Create Database and user
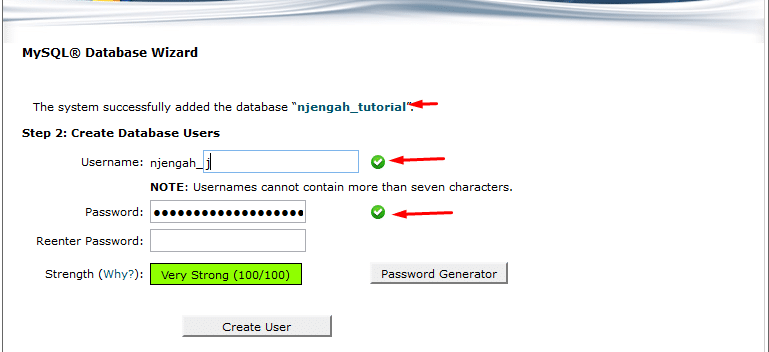
Creating a database on your web host may vary from one host to another but the most basic way of creating a database is through MySQL wizard. Click on MySQL database wizard button in your web host control panel and follow the steps to create a database and create the user.
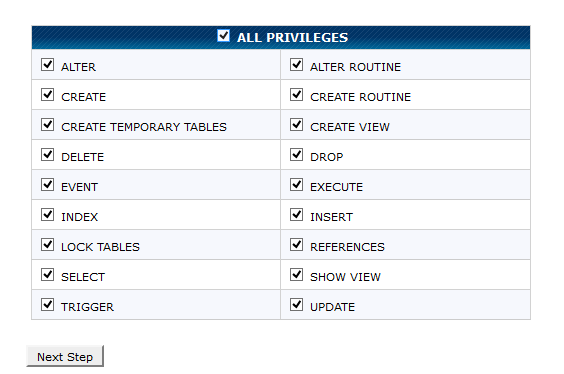
When you create the database user remember to assign the database user global privileges.
Allocate the newly created database user with all the global privileges. Assigning user privileges for the specific database can also be undertaken using Phpmyadmin. There may also be a possibility to create the database under the Phpmyadmin panel on your web host. For my web host, we must use MySQL wizard to create the database but manipulation of the database is done using Phpmyadmin. I outlined the process of creating a MySQL database using Phpmyadmin in my previous tutorial – installing WordPress on localhost Xampp & Wamp. The process is basically the same as creating a database via the web host Phpmyadmin panel.
After you have created the database and added a user who has global privileges it is time to now start setting up your WordPress installation.
3) Configure WordPress Setup
After creating a database we are now ready to begin setting up WordPress. Now visit your site. In my case I will go to my browser and type:
Your site or directory where you are installing WordPress - http://njengah.com/tutorial
When you visit your website you should now see the WordPress installation screen. Select the language you want to install WordPress in and proceed to database configuration.

Fill in your corresponding database details; the database name, the username, password, and host. Please note the hostname always remains localhost. It is localhost since it is the relation between the installation and the database, they are both located in the same server thus localhost. This may also vary in rare circumstances where the host provides a database URL or host IP.

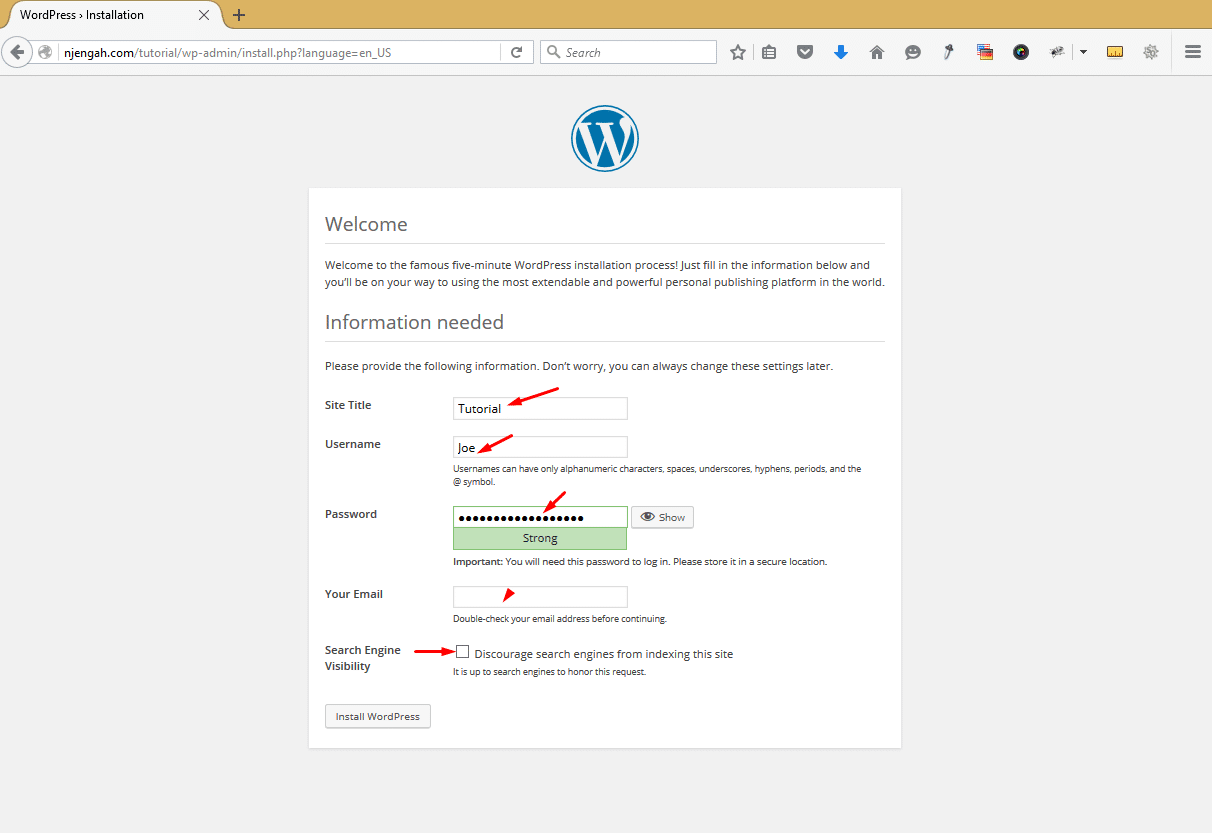
4) Run WordPress Installation
After filling in your database configuration settings, proceed, if they are correct you should now see the WordPress installation page.
Now fill in the details about your site, the site name, admin email, username, and password then run WordPress installation.
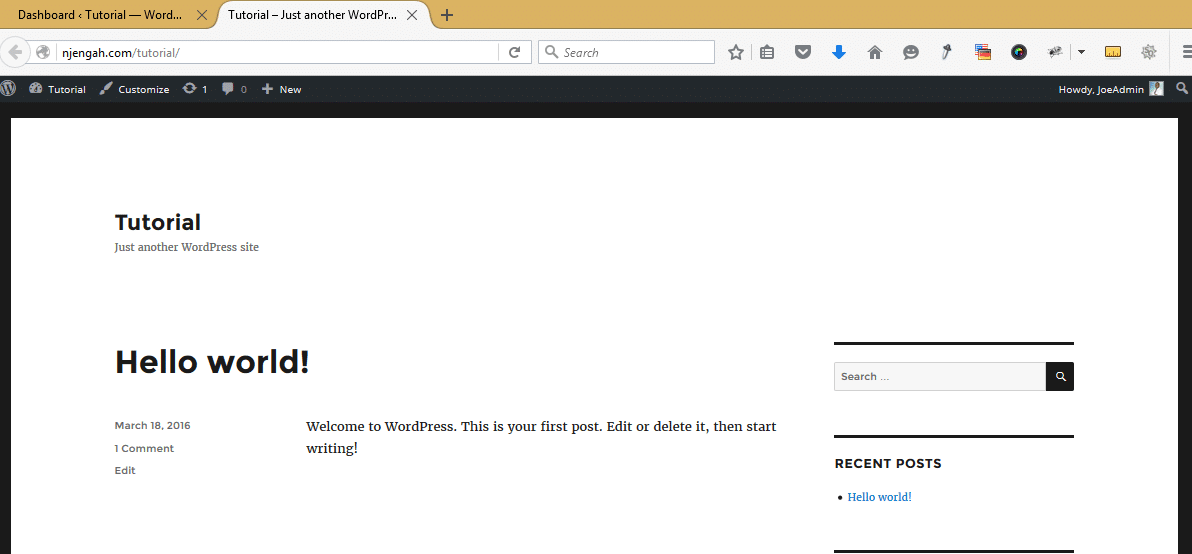
5) Test Your Installation
When you have completed installing WordPress manually on your web host, you should now test to see everything is working well. Get the logins from your admin email or where you saved and go to the WordPress login screen and log in to test your site. If you followed everything correctly, you should now have a functioning WordPress installation on your domain or subdirectory.
Subdomain WordPress Installation and .htaccess
To install WordPress manually on a subdomain, you should follow the same steps the only difference is the location of your WordPress files. Instead of uploading WordPress to site folder – public_html/yoursitefolder.com you should upload to the subdomain folder something like public_html/subdomain.yoursite.com
Finally, you may encounter some 404 errors when you install your site on a subdirectory as I did. To solve these errors it may be important to ensure your .htaccess file looks like this:
<IfModule mod_rewrite.c>
RewriteEngine On
RewriteBase /subdirectoryname/
RewriteRule ^index\.php$ - [L]
RewriteCond %{REQUEST_FILENAME} !-f
RewriteCond %{REQUEST_FILENAME} !-d
RewriteRule . /subdirectoryname/index.php [L]
</IfModule>
Please note there is the subdirectory name in the .htaccess indicating the paths of your URLs. You can learn more on how to configure your .htaccess from Ultimate WordPress .htaccess Guide.
Install WordPress Manually via FTP
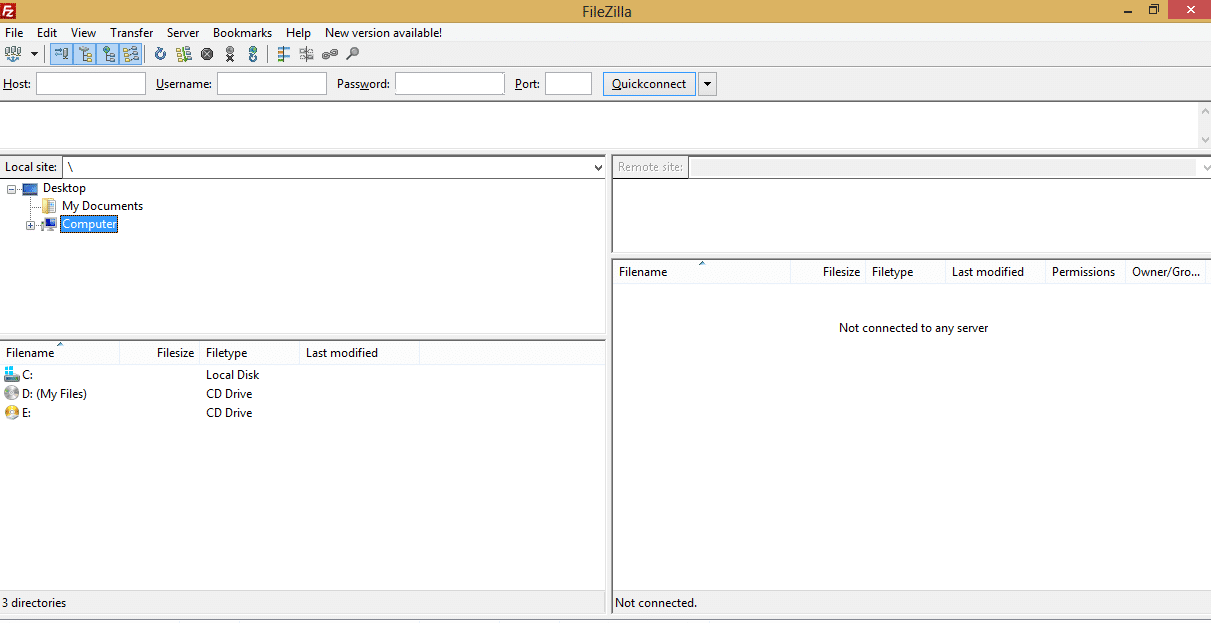
The process of installing WordPress manually via FTP is largely the same as that of the control panel. You should first create the database via the Cpanel.
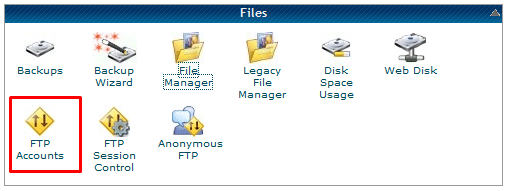
Then upload the file through FTP to your respective site folder. Finally, run the WordPress installation process just like that of the control panel. The only difference between the two methods is how files are uploaded to your server. To login to your FTP check the FTP account details from your web host panel
Conclusion
We have successfully installed WordPress manually on the web host using the control panel and also using FTP. You too can use these five steps to install WordPress on your web host if you want to be in control of things and don’t want to use the quick WordPress installers. The process of installing WordPress whether on localhost or a web host is largely the same, since you need to first create a database then link it up with WordPress.
I hope this article has enlightened you on how to install WordPress manually on the web host. If you have further questions, compliments, or want to seek clarification, please leave us a comment.
No Comments Yet