Accessing WordPress Database via Phpmyadmin
Ensure you have backed up your WordPress database or you have installed WordPress on your localhost for you to learn how to manipulate the database using Phpmyadmin. Phpmyadmin is free software that is very useful for accessing WordPress databases and making changes. For live sites, Phpmyadmin can be accessed through your hosting Control Panel. On your hosting control panel find the icon for Phpmyadmin.
![]()
When you click on this button you will be redirected to Phpmyadmin, some hosting environments may have direct access to Phpmyadmin while others will require you to log in. You can use the Cpanel username and password to login into the Phpmyadmin panel.
If Phpmyadmin is not present in your hosting, you can download and install it on your server to begin using it. To download Phpmyadmin and install it on your server, read the documentation on the official site – Phpmyadmin
Getting Started with Phpmyadmin
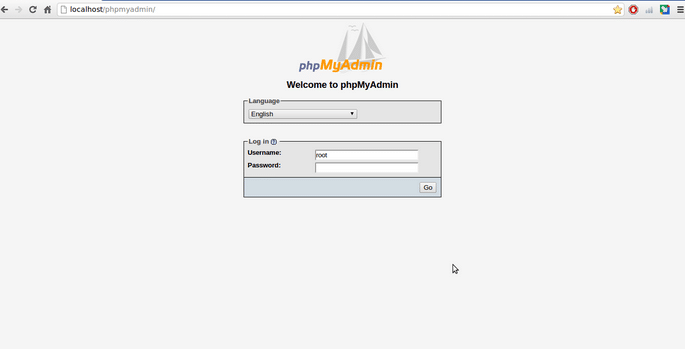
To access Phpmyadmin on your localhost use the following URL:
http://localhost/phpmyadmin
When you have logged into the Phpmyadmin panel it should be something like this:
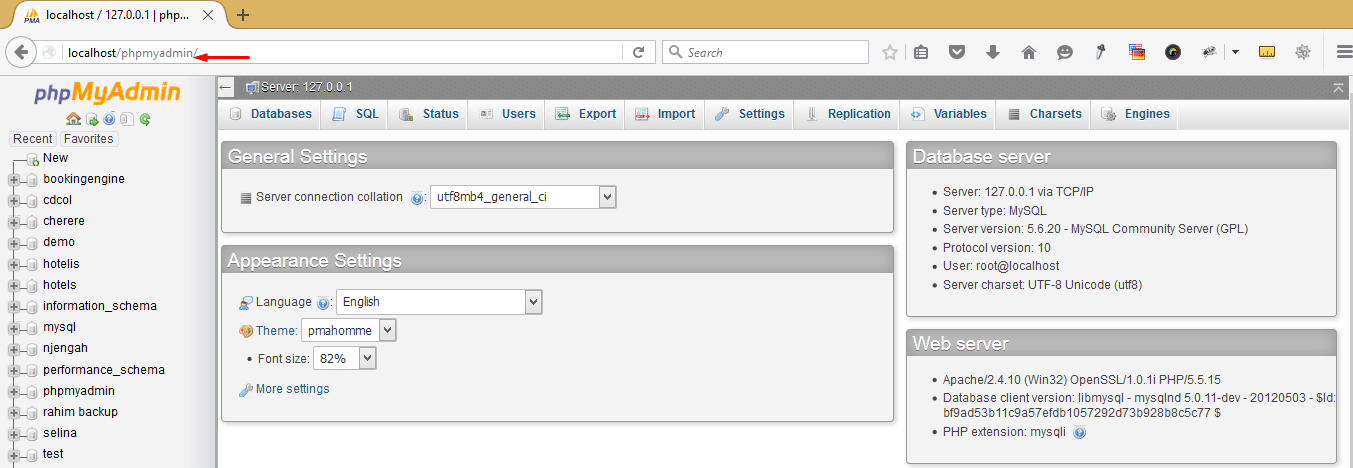
On the left side of the panel, you should see a list of databases that you have created. On the top, there is a menu that includes databases, SQL, Status, Users, Export, Import, Settings, and others. You will use this Phpmyadmin panel to make edits to your database and save those changes.
Locating WordPress Database
To begin making these changes, you need to first identify the database and open it. If you have many databases, it may be difficult to identify by name unless you created it. If you installed WordPress manually on your web host, you should easily identify the database name.
If you installed WordPress using Quick Installer like Fantastico, the database names are usually auto-generated. The easiest way to locate the database is to check the name in the wp-config.php file. Open this file and locate the following line of code:

Now check the database on the left side column on the Phpmyadmin panel. When you identify the database click to open it:
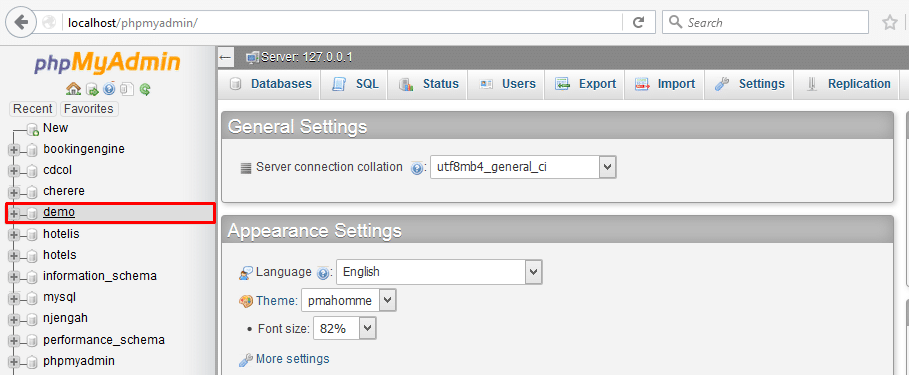
For this tutorial, our database is named ‘demo’ that we initially created when we installed WordPress on localhost - Xampp
How to Backup WordPress Database on Phpmyadmin
The first step when editing your WordPress database via Phpmyadmin is to learn how to back up your WordPress database. You can easily backup your database before editing using the export option in the Phpmyadmin panel
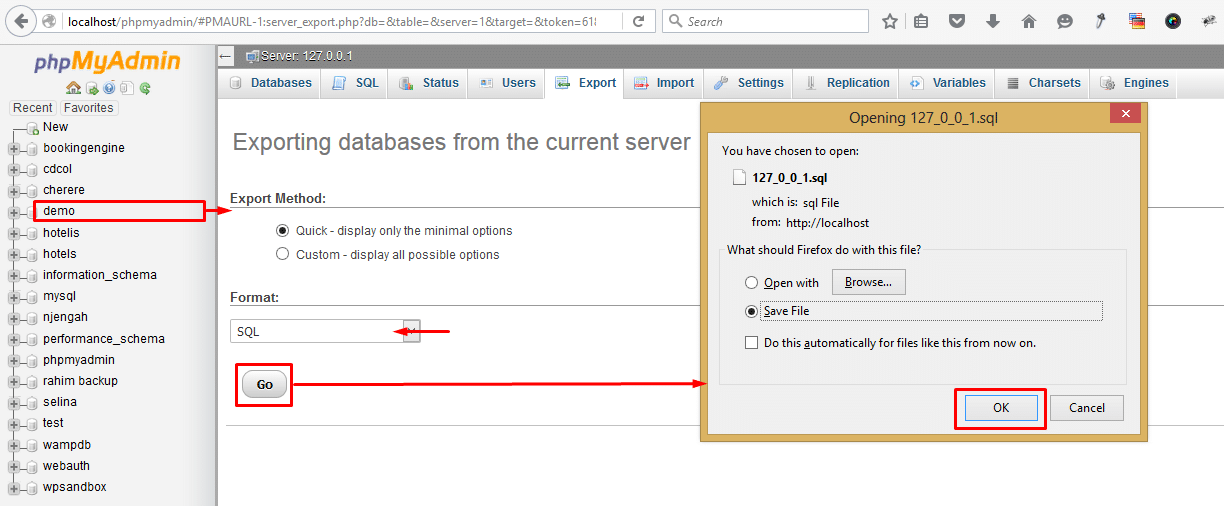
Exporting WordPress Database from Phpmyadmin
After identifying your database click on the Export option on the menu and create a backup copy of your database. Choose the quick option as the export method and select the SQL option as the file format. Once you have clicked on the go button save the database as your backup. When you choose to save the file ensure you save it in the format .sql.
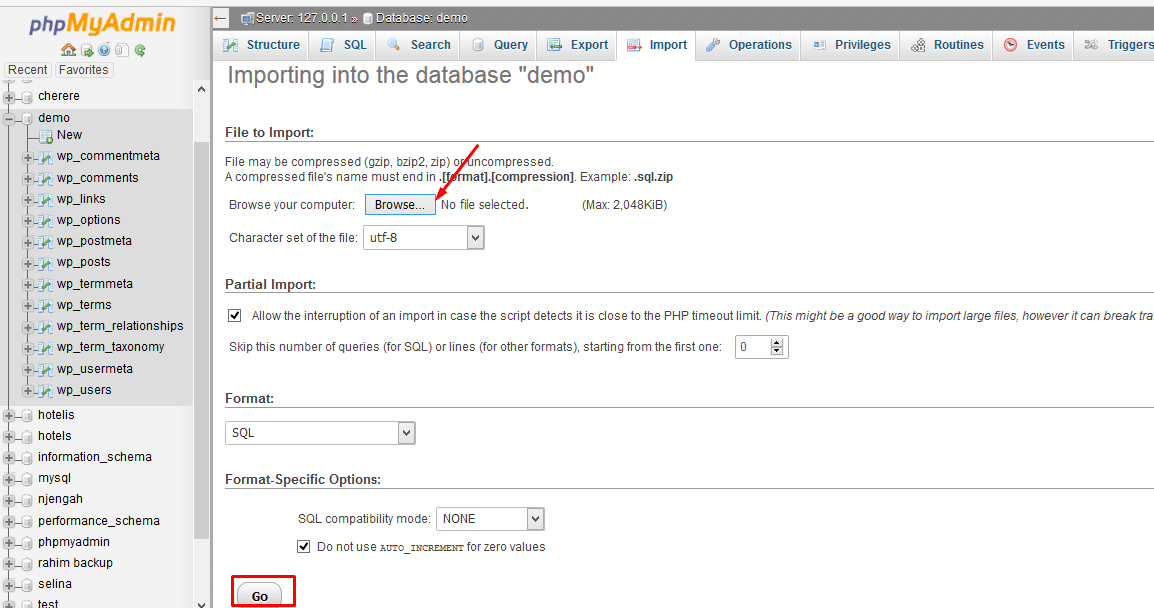
Restoring WordPress Database Backup via Phpmyadmin
When you edit your database and something goes wrong, you can restore the database by using the import option and uploading the backup database. You can do either complete or partial database restoration, the format for the database should always remain SQL for easy restoration.
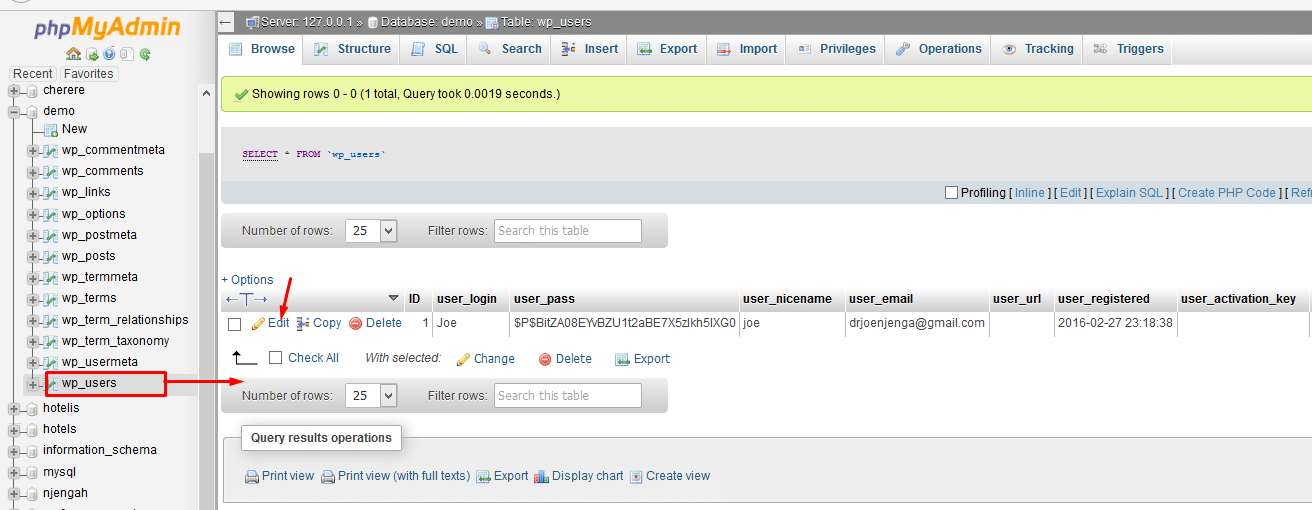
How to Change and Password via Phpmyadmin
When changing the password through Phpmyadmin you should ensure you don’t mess with other entries. You can change the password of your site through Phpmyadmin. To change the password or the username click on the wp_users table on your database and select the edit option as shown in the image below.
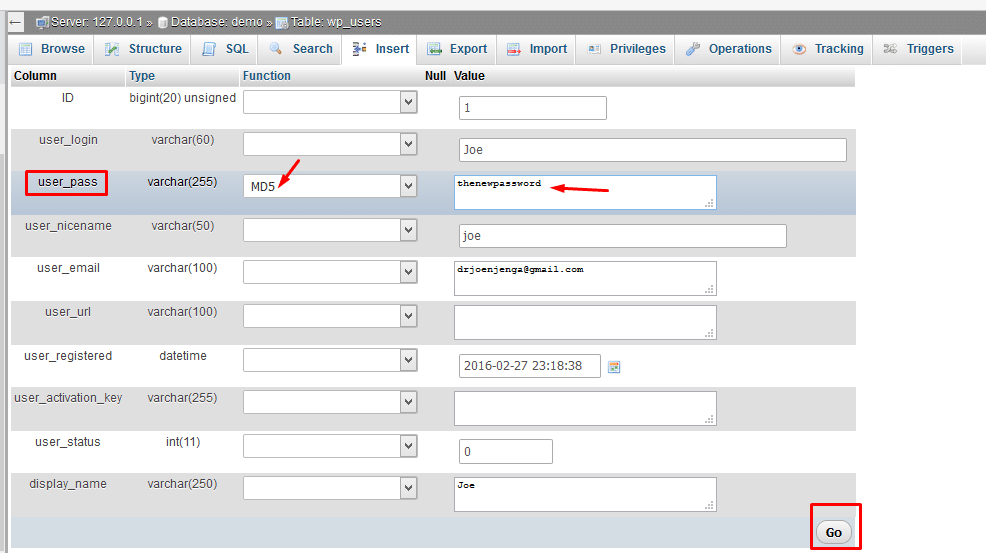
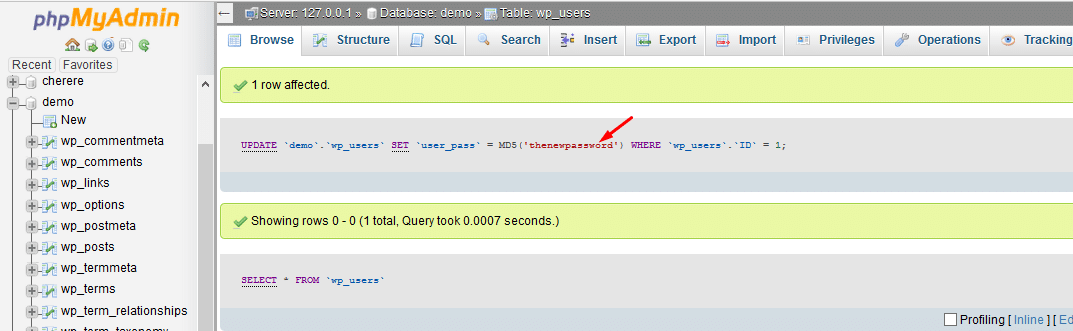
When you click on the edit option you will see the database fields that you can edit or insert new entries. To edit the password look at user_pass and make the changes as follows:
Change the function field to MD5
Insert the new password example –thenewpassword
Click on the GO button to save the changes
When you have successfully changed the password you should see the result displayed as shown below. You should try out the new password on your site to see if you changed it successfully.
You can also change the username field to reset your username to a new username.
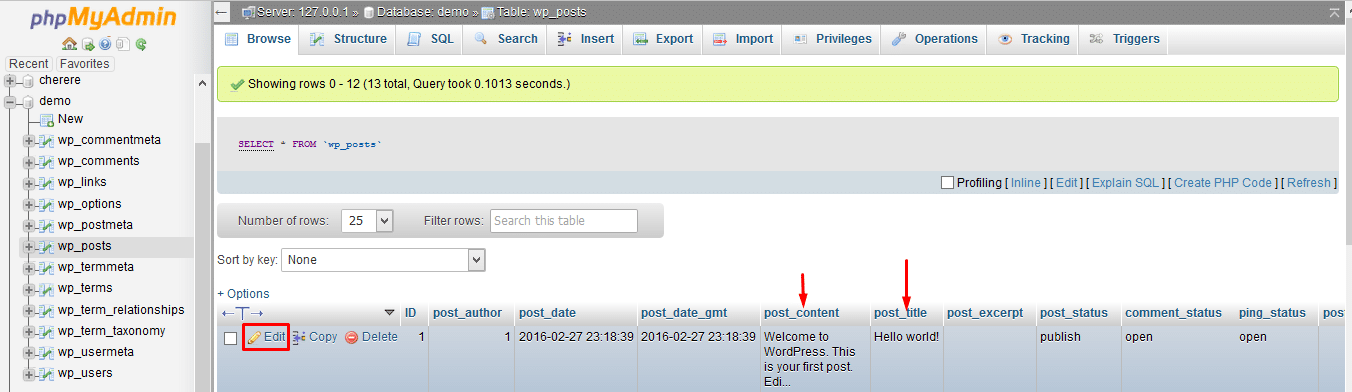
Editing Posts and Pages via Phpmyadmin
You can also edit the post and pages via the Phpmyadmin panel, click on wp_posts and you can edit the post content and the title of the pages and posts.
Conclusion
As you have seen in this tutorial, you can edit several entries in your WordPress database entries. Phpmyadmin is a great platform that allows you to manage entries in your WordPress database. You can also use it as an alternative option of changing your username, password, or admin email. This panel provides you with a great way to manipulate your WordPress database but you should always exercise caution to avoid losing your valuable data when making the changes. I hope this article enlightens you on how to start tweaking your WordPress site by making these changes through Phpmyadmin. If you have further questions, comments, or compliments free feel to leave a comment.
No Comments Yet