Recently we talked about adding new widget areas to your theme. In today’s post, we’re going to talk about styling widgets in order to give you even more control.
People often run into problems when trying to style their widgets. We’re going to go over some of the common problems and run through an example.
As we’ll be changing the style of your theme, you’ll either want to create a child theme or get a custom CSS plugin to put your style in. This way you won’t lose it when your theme gets updated.
Finding Your Widget’s CSS ID
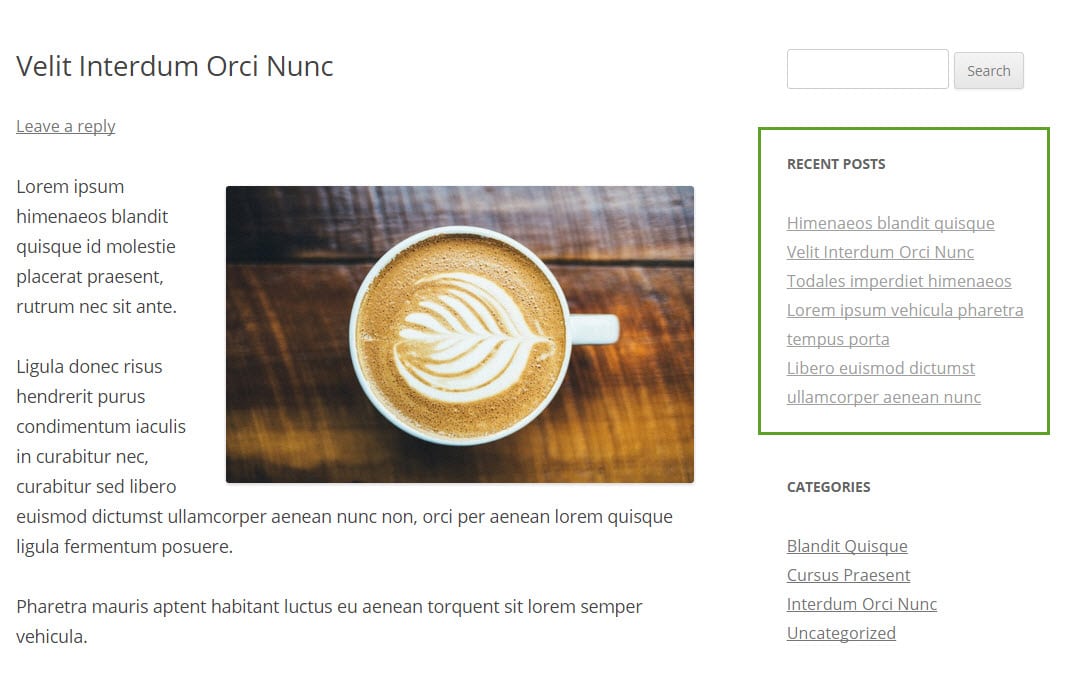
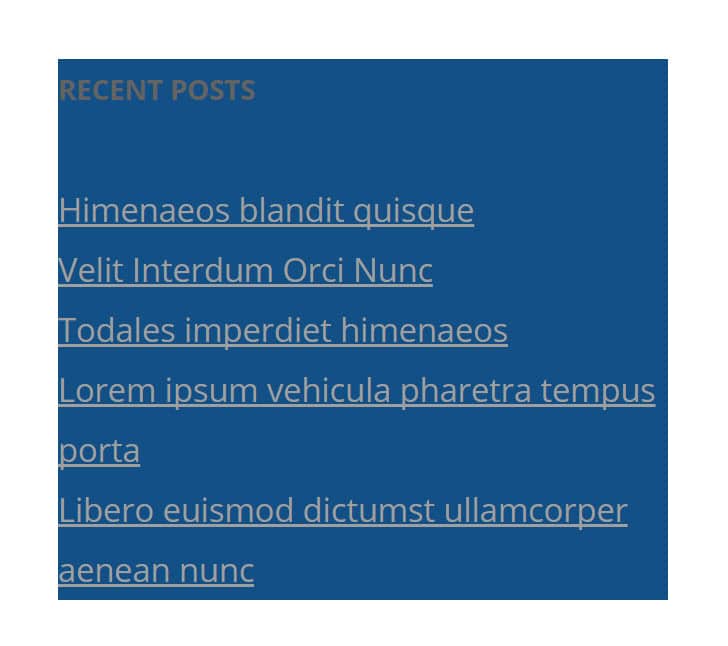
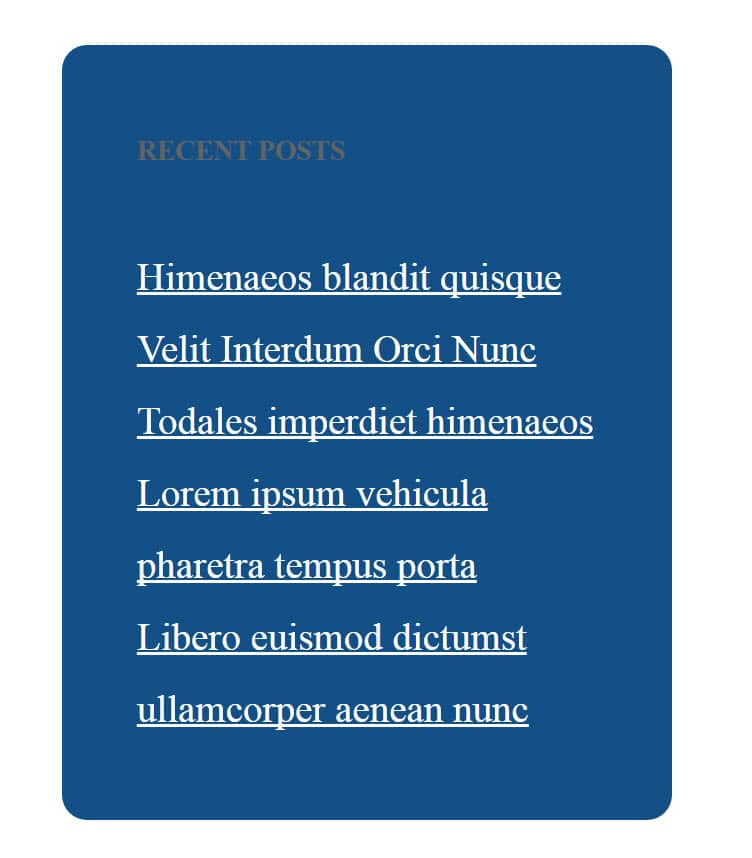
I’ve decided I’m going to style up my Recent Posts widget. It looks a little boring.
Here it is in its original state.
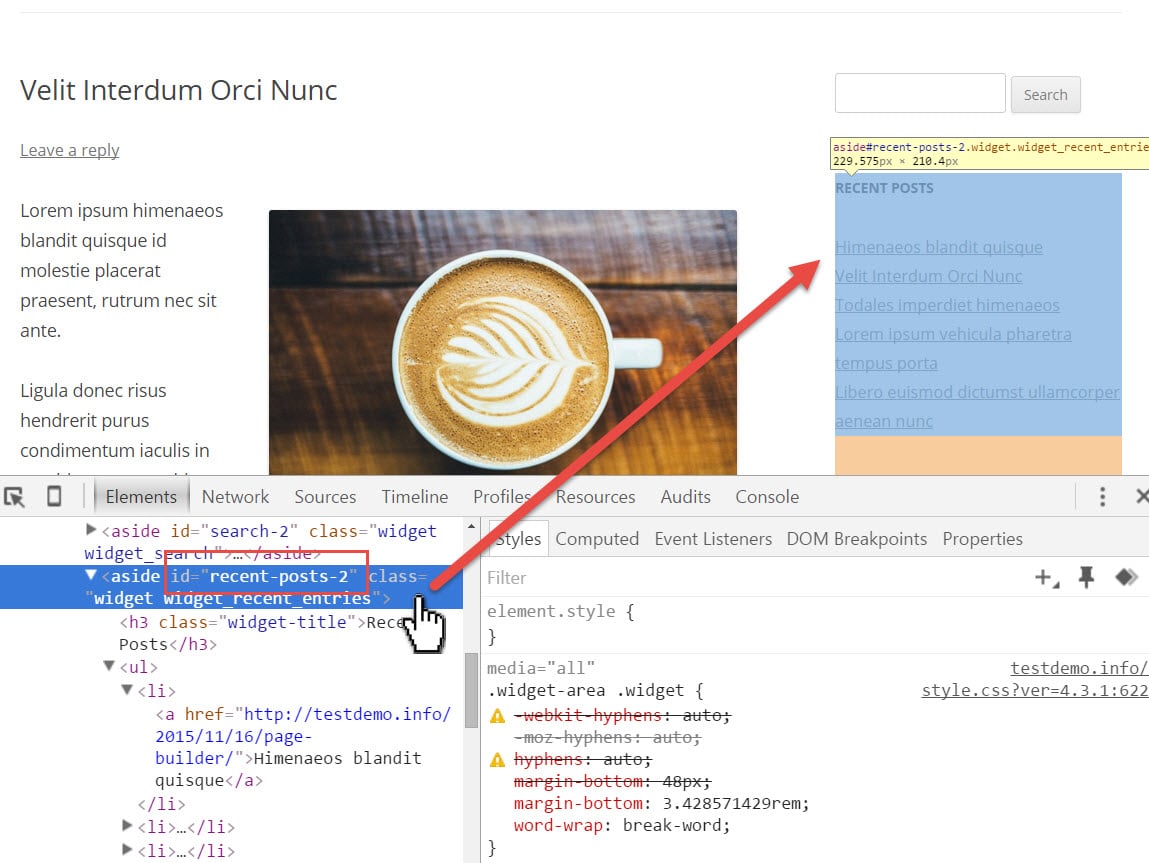
In order to find the CSS ID for your Recent Posts widget, using either Chrome or Firefox, right-click on the widget and then click “Inspect Element.”
It will bring up some new code windows at the bottom (or side) of your screen.
Next, in the left-hand pane of the code, move your cursor over the different lines until you see the whole widget become selected in the top pane.
When you find the line that selects the whole pane, you should be able to see an ID there.
You can see my ID is “recent-posts-2”.
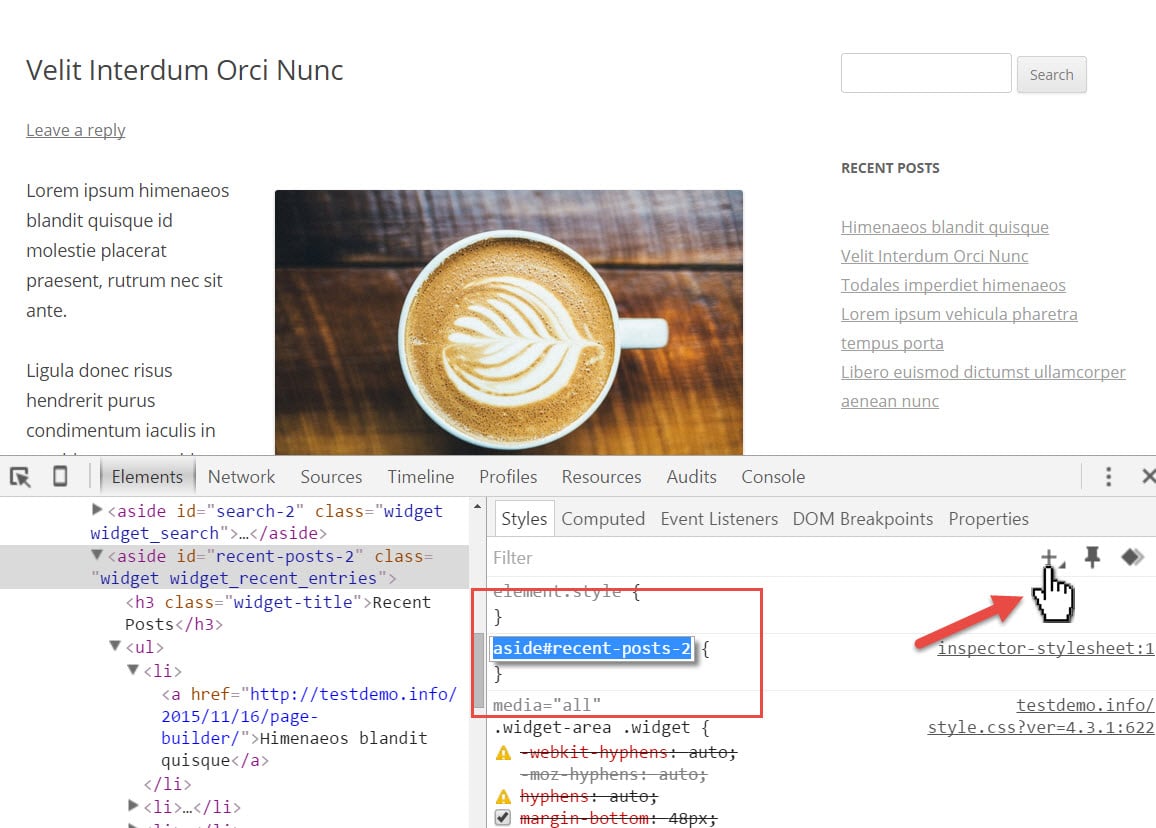
Another way to do this is to find the line that selects the whole widget, and then click the plus button on the right-hand pane. This will automatically give you the ID that you need. (CSS can be a little complicated, and this doesn’t always work)
Here you can see that the ID is “aside#recent-posts-2”.
When I put my code in my stylesheet, I’m going to want to use that (or in this case #recent-posts-2 will also work).
Styling the Widget
There are a few things to know about a widget like the Recent Posts widget.
It has a main container that will need to be styled.
It has a title that will need to be styled (separately).
And because they are recent posts, you will also need to style the links (they take a different styling than just regular text). These will also need to be styled separately.
So that means I will have 3 different sections of new CSS code: one for the main container, one for the title, and one for the links.
The Widget Container
Let’s start with the main container.
First I’ll give it a background color – a nice dark blue.
#recent-posts-2 {

background-color: #135086;

}
Next, I’ll give it some padding so that the text doesn’t run up against the edges of the container.
#recent-posts-2 {

background-color: #135086;

padding: 30px;

}
Next, I’ll change the font to Times New Roman.
#recent-posts-2 {

background-color: #135086;

padding: 30px;

font-family: Times New Roman;

}
The next thing I’ll do is round off the corners of the box.
#recent-posts-2 {

background-color: #135086;

padding: 30px;

font-family: Times New Roman;

border-radius: 10px;

}
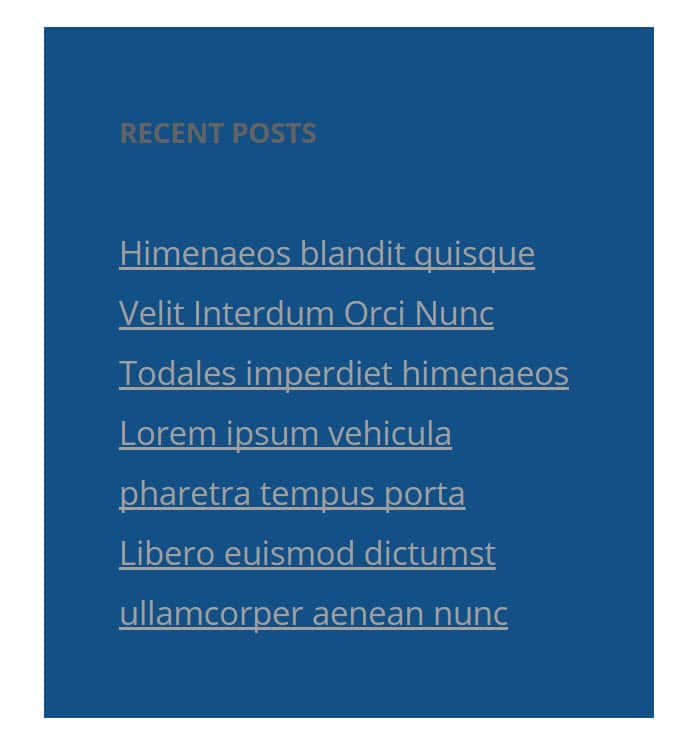
Because I changed the background, now the text doesn’t stand out. So I’ll obviously want to change that.
Because we’re dealing with links, however, I’ll need to start a new section of CSS and change the color there. So let’s start that new section.
Styling the Links
I want to change my text (i.e. links) to the color white. I also want to make them a little bit bigger.
So here’s the code I’ll use for that.
#recent-posts-2 a {

color: #ffffff;

font-size: 1.2em;

}
You’ll notice the “a” in the code above. That’s what targets the links.
Changing the 1.2 number to something higher or lower will control the size.
And here’s how that looks.
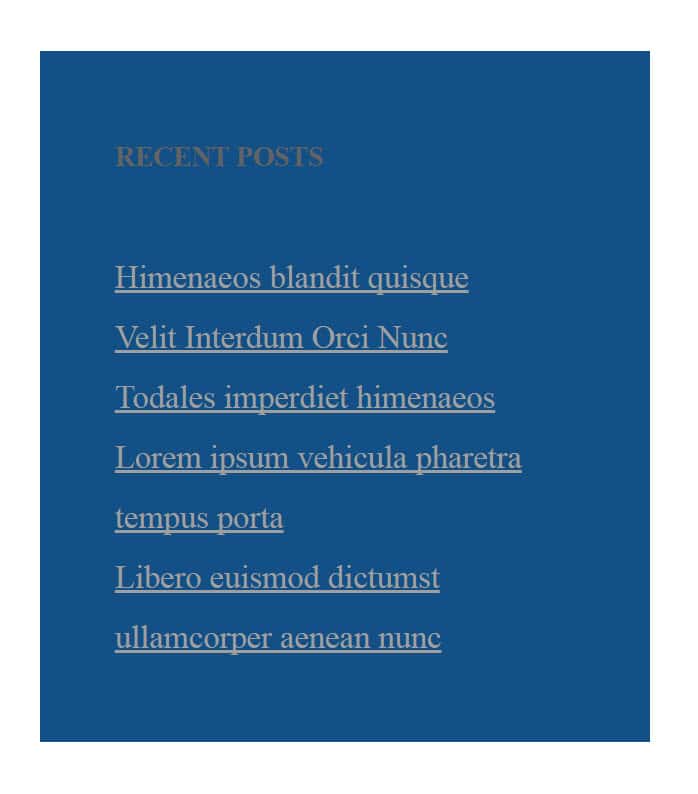
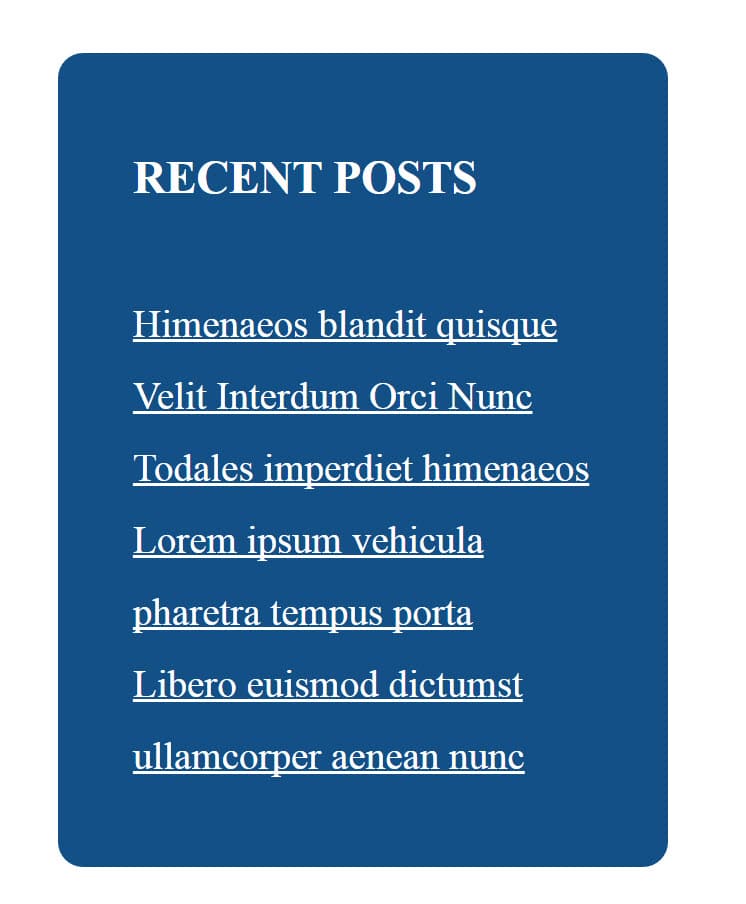
Changing the Title
Finally, I still have to change the header.
When I inspected the widget with Chrome, I was able to see that the title was wrapped in h3 tags, so I’ll need to target those h3 tags.
I’m going to change the color to white, and I’ll also enlarge the header.
#recent-posts-2 h3 {

color: #ffffff;

font-size: 1.3em;

}
And so here’s the final product.
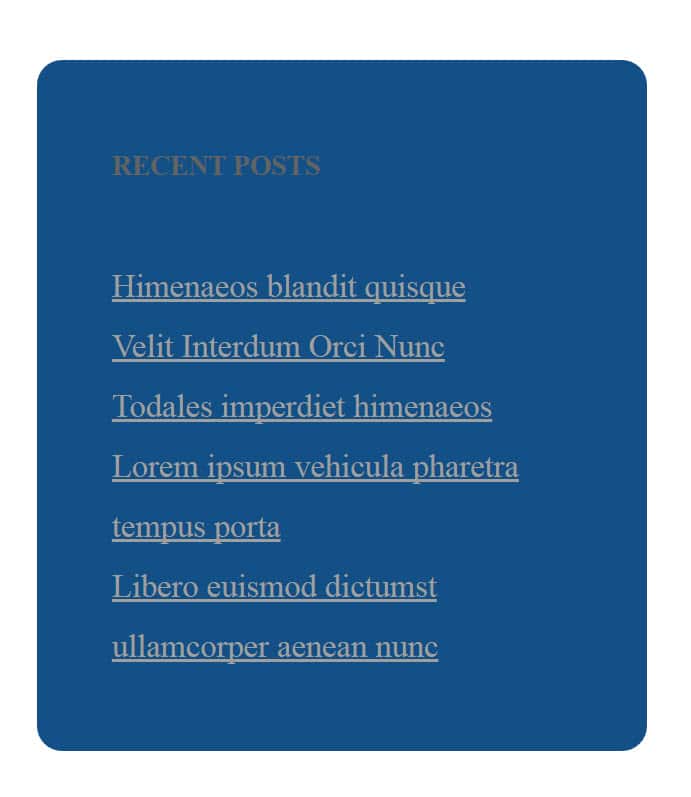
And here’s all the code together.
#recent-posts-2 {

background-color: #135086;

padding: 30px;

font-family: serif;

border-radius: 10px;

}
#recent-posts-2 h3 {
color: #ffffff;
font-size: 1.3em;
}
#recent-posts-2 a {
color: #ffffff;
font-size: 1.2em;
}
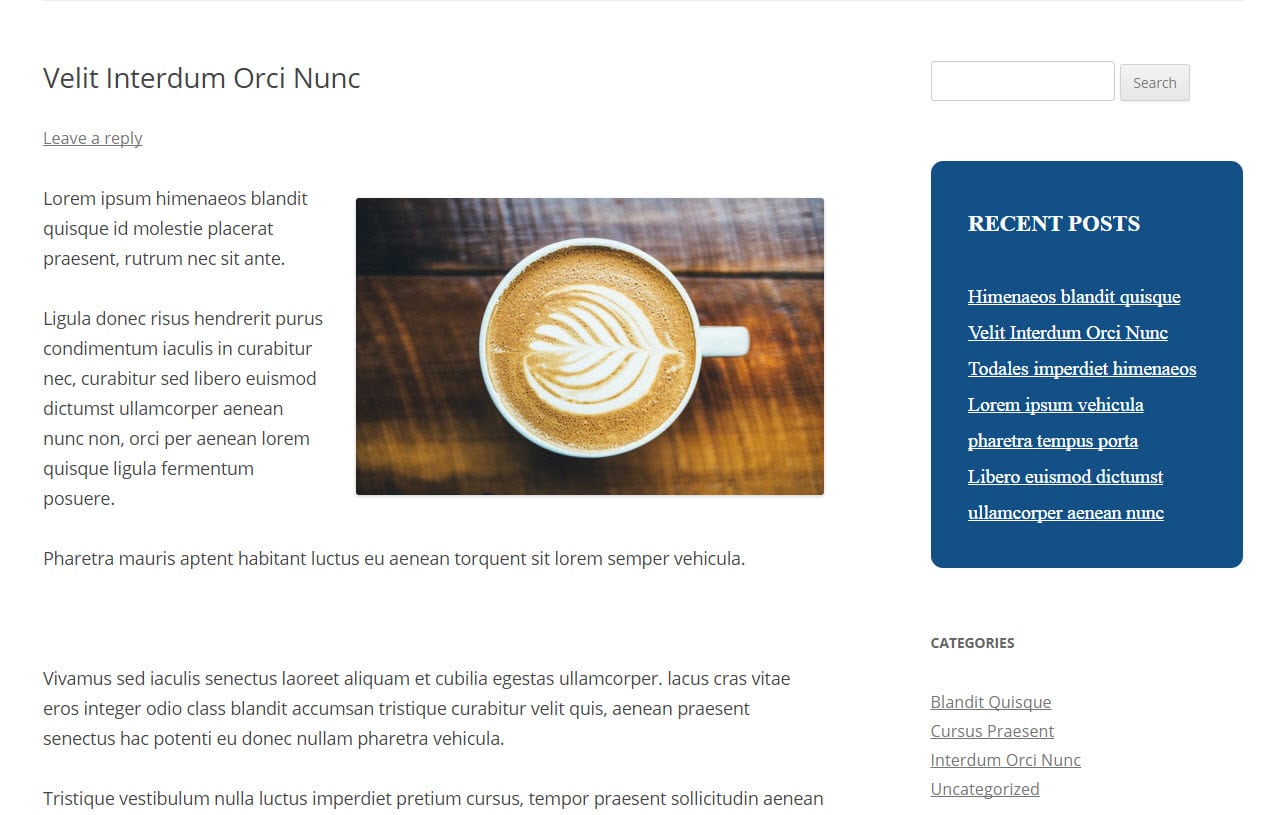
And here’s what it looks like on the page.
No Comments Yet