Before learning how to create a child theme, it is important for you to know what a child theme is and why it is important. A child theme is a separate theme that is dependent on a parent theme to function. A child theme gets all the code from the parent theme. It is thus a child of the parent theme. Customizing a theme makes it hard for you to update it to the newest version without losing the changes you made. If you are making any changes to your current theme you need a child theme. A child theme makes it possible for you to update your parent theme without losing your changes and lets you use all themes functionalities in the child.
Creating a Child Theme
Now that you know what a child theme is and when it is used, let’s learn how to create a child theme. To get started with it, you need to have some HTML, CSS skills, and PHP basic skills. You also need to have the logins to the theme file from the hosting Cpanel or the FTP. If you have an option to download the theme, you can create a child theme on your local host.
In the web host environment, you can use an FTP account from software such as Filezilla to make it easier for you to edit and add files to your server. For this tutorial, we will be creating a child theme in the localhost demo site we created in the tutorial - installing WordPress on localhost.
Step 1: Create a Child Theme’s Folder
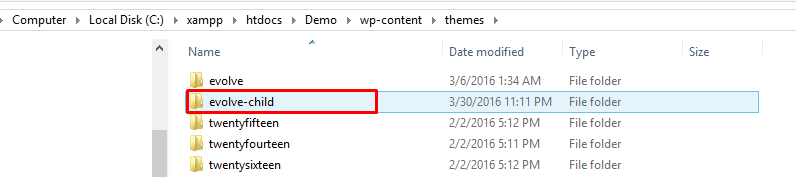
Creating a child theme’s folder is the first step. Login to your website using your FTP client and go to “wp-content/themes/”. Inside the theme folder, you will see folders with the themes installed on your website. Create a folder and give it your preferred name. It is important to give the folder a descriptive name that will help you know that it is the folder for the child theme. I created Evolve theme child theme folder inside my WordPress localhost installation as shown in the image above.
Step 2: Create Child Theme’s style.css File
After creating the child theme’s folder, you now need to create the child theme’s style.css file. The style.css file is important since it works as a supplement of a kind to your parent theme’s style.css file. To create the style.css file, open a text editor and type or paste the following:
/*

Theme Name:     Evolve Child Theme

Theme URI:      http://www.theme4press.com/themes/evolve

Description:    Evolve Child Theme

Author:         Theme4Press Themes

Author URI:     http://www.njengah.com

Template:       Evolve

Version:        1.0.0

*/
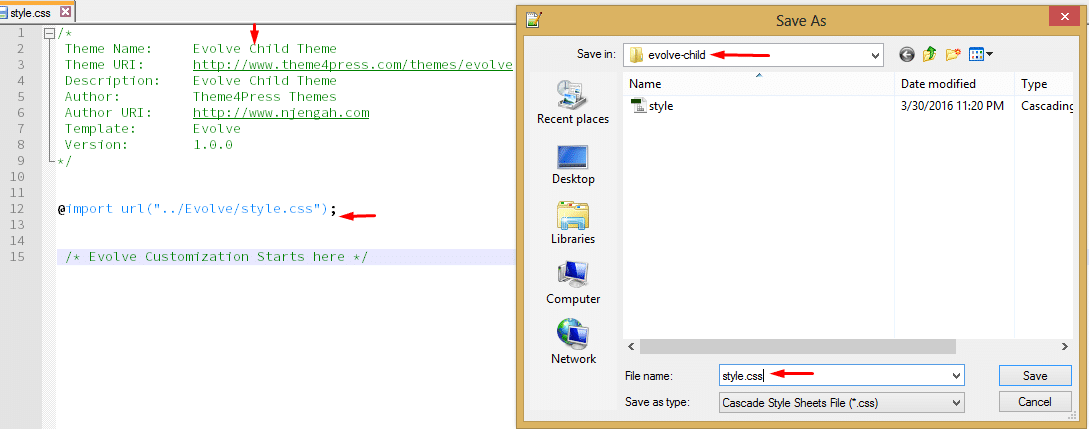
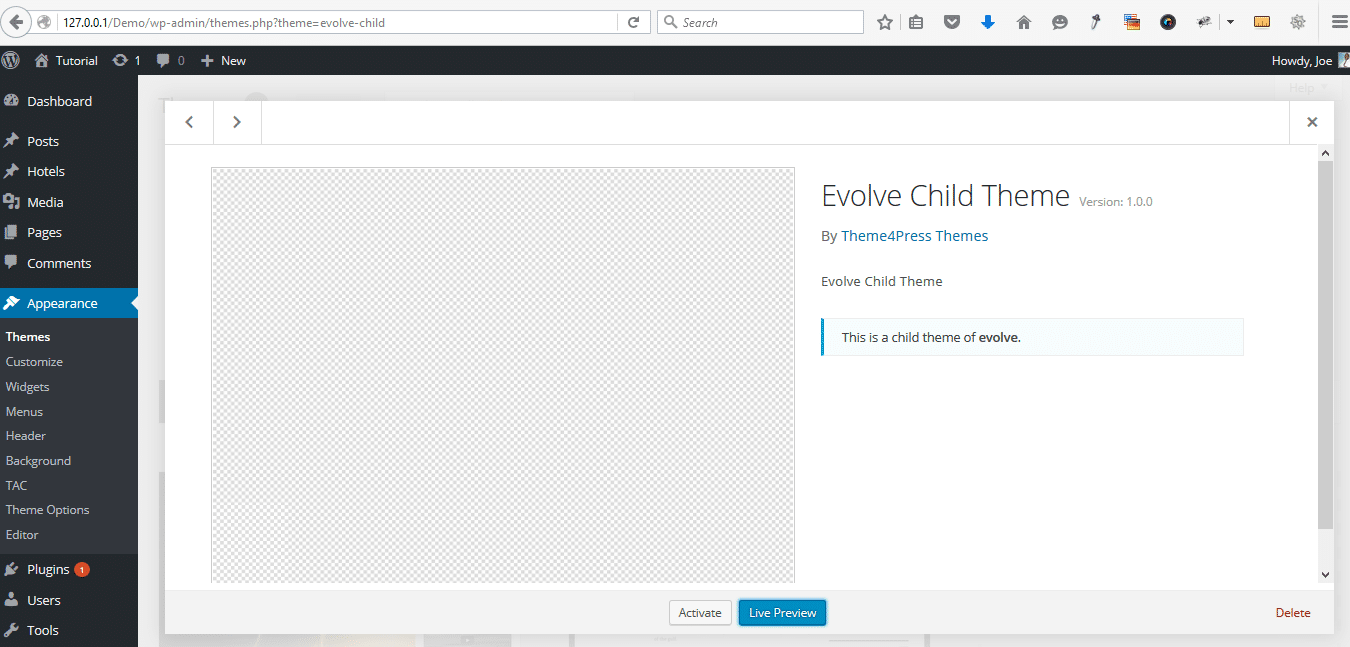
Note: The information above is specific for this tutorial and can be altered to match your theme name, URL, and description. You need to change the “Template” variables so as to make your child theme valid. To elaborate with an example; if you have installed the “Twenty Sixteen” theme on your website and you want to create a child theme for this theme; you will replace parent theme details with “Twenty Sixteen”. Here is a screenshot of what you should have on your text editor and how to save it in your child theme folder as style.css.
Step 3: Call the parent theme’s CSS file
It is important for you to call the parent theme’s CSS file without the child theme’s style.css file to prevent WordPress from making your child theme’s style.css file the default style file. In the event that WordPress makes your child theme’s style.css file the default style file, the theme would not have any CSS styling. To prevent this from happening; you need to add the following line of code to your child theme style.css file.
@import url("../parenttheme/style.css");
After adding the above line of code, save your style.css file to your child theme’s folder.
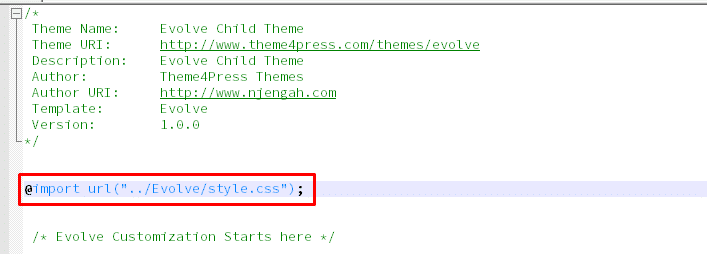
This line of code tells WordPress to import all of the CSS from your parent theme’s style file prior to implementing any CSS in the child theme’s style.css file thus the parent theme’s style file will take precedence over any other CSS. You can now start creating additional styles below the comment. Any customization added to this theme will remain intact even when Evolve theme is updated. After saving this file when you navigate to your themes in the dashboard you should see the child theme is present and ready for activation.
Step 4: Activate your Child Theme
The fourth step is to activate the child theme. To activate the child theme; go to “Appearance > Themes” in your WordPress admin area and you will see all the themes on the website. You will note that the parent theme is activated.
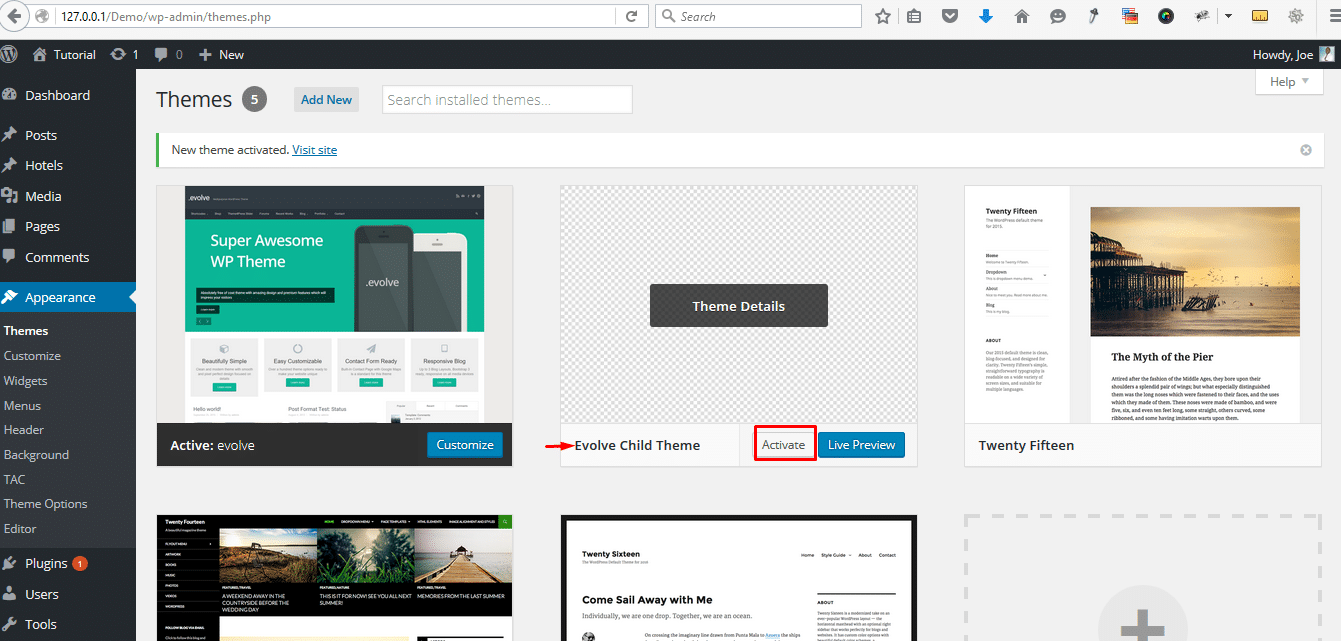
Look for your child theme with the information you used when creating your child theme’s style.css file and click on the activate button and your child theme will be active and it will be shown as the active theme. When you have activated your child theme, it is now time to test it and see if everything works well. Visit your site and see if your child theme is working well and add some customization to try it out.
Step 5: Using the Child Theme
Now that you have created your child, it is time to make use of your child theme by adding customization on your child theme. Before we can add any customization Evolve child theme is working well.

With the child theme ready, you can now make any changes to your theme without worrying about losing the changes. The changes you make on the parent theme, copy and paste it on your child theme’s directory and the changes you make will go live.
Step 6: Customizing Child Theme
We can now comfortably carry out changes on our child theme by adding the changes in the stylesheet. For illustration, I would like to change the color of the header to red. I carry out the mock customization using Firebug plugin as follows:
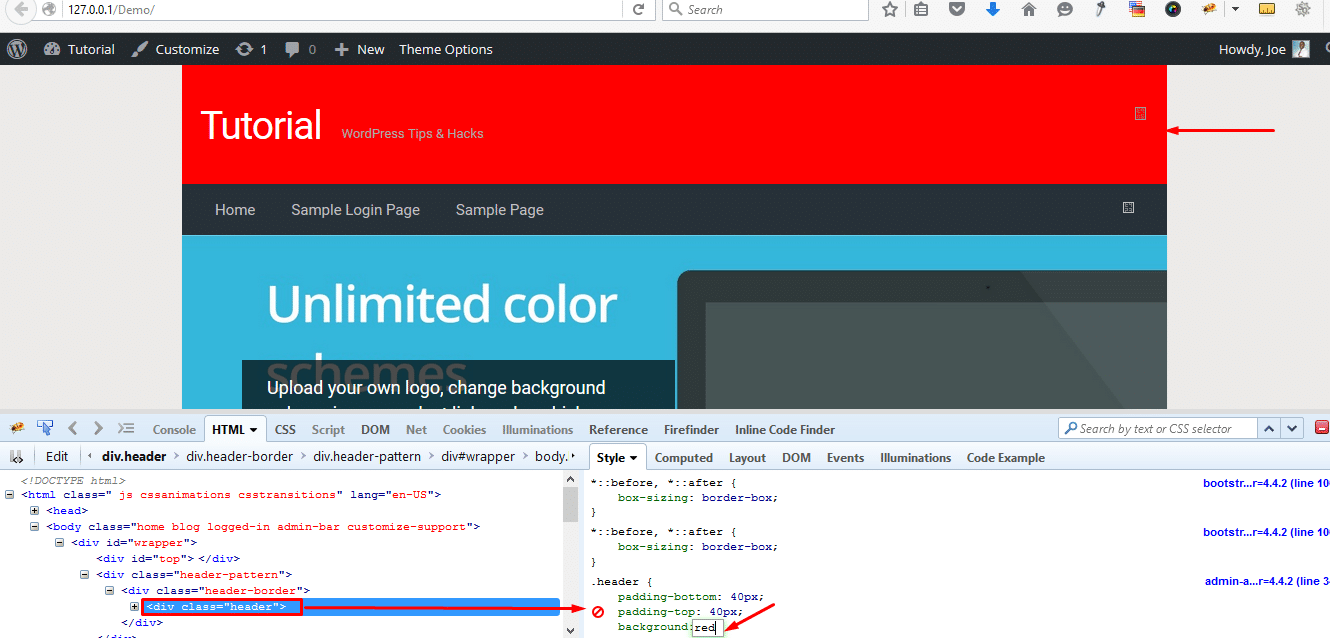
From this mock customization, we need to add the following line of code in our child theme style sheet to change the color of the header to red.
.header {

background: red none repeat scroll 0 0;

padding-bottom: 40px;

padding-top: 40px;

}
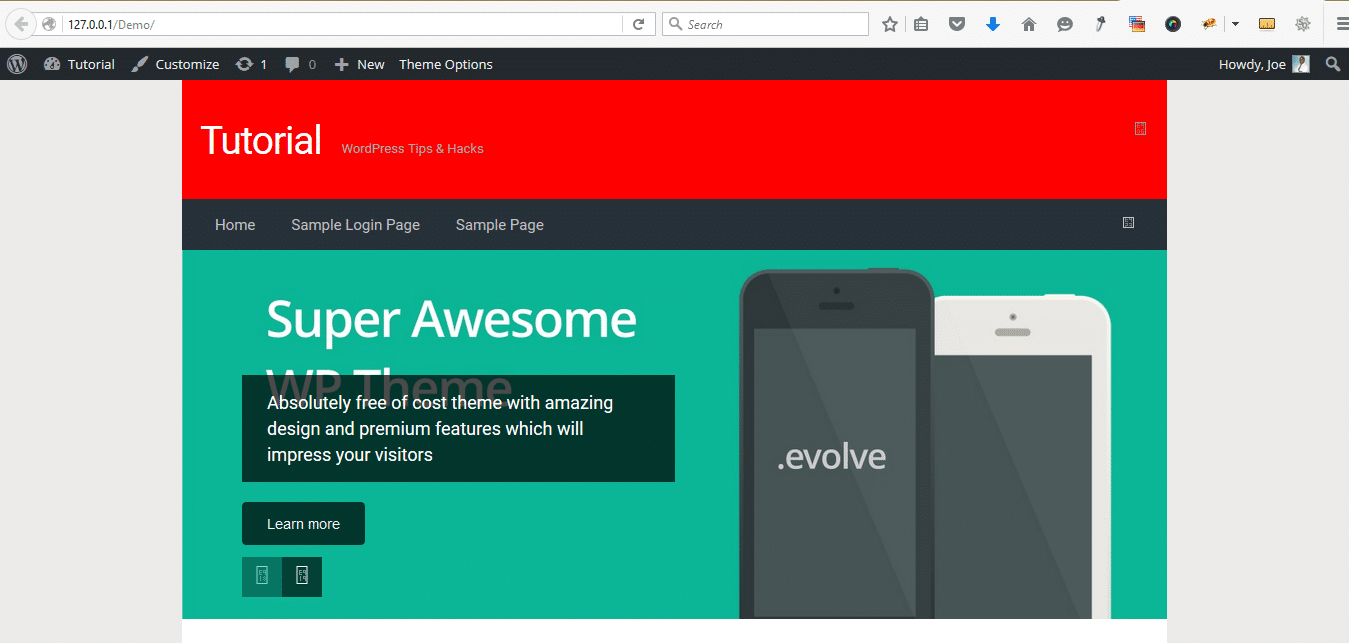
You can learn how to get started with WordPress theme customization but this should get you the red header in your child theme. This change will remain intact when you update Evolve theme. This saves you a great deal of time and headache that you will have when updating any WordPress theme, whilst you do not want to lose the custom changes you have made to the site. The site should now look like this after updating the child theme stylesheet :
Conclusion
With these steps, we have successfully created a child theme for Evolve and demonstrated how to make any changes to the theme. We can now comfortably make a child theme for any theme and carry out theme customization on the child instead of editing the parent theme. I hope this tutorial has demonstrated what you need to know on how to create a child theme step by step and you have successfully created one. I would like to hear from you about your experience creating a child theme, feel free to leave a comment.
http://tech.mycareergrow.com/how-to-create-child-theme-in-wordpress-step-by-step/
That’s Good Solution about this ….
But import function makes site slowers. its not recommended by google. what say?
I see that icons loaded (White rectangles on the right side of the menu). I have the same problem. Any ideas how to fix this?
sorry * icons don’t loaded
Can I load and install my new child theme on another site? If so how?