
Sometimes you want something a little different for a certain post, you want it to take a different style for some reason.
While there are page builder plugins you might use, unless you’re going to be using them regularly, it’s probably not a good idea to have another plugin weighing your site down.
In cases like this, there’s an easier solution: simply apply the new styles via CSS.
We’ll go over how to do that below.
As you’ll be adding new CSS to your theme, you should either create a child theme or get a custom CSS plugin.
If you don’t, then when you update your theme, all your added code will be lost.
Find the ID of Your Post
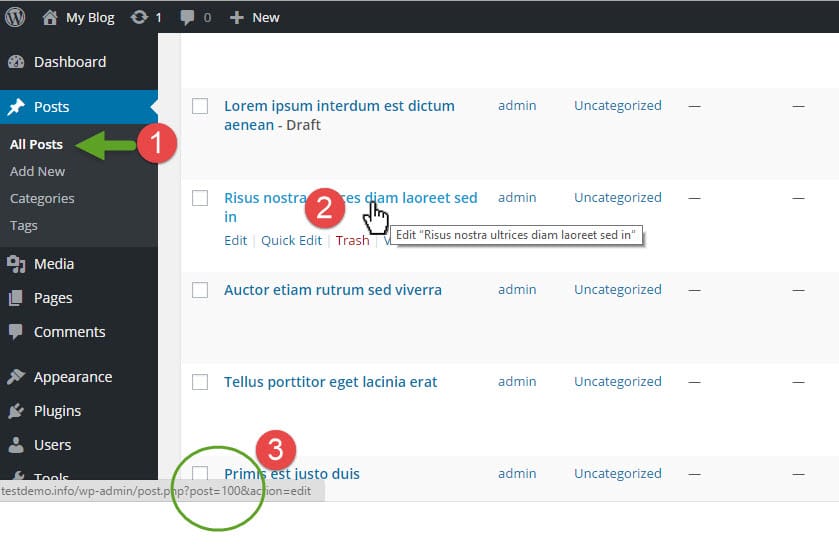
The first thing you’ll want to do is find the ID of the post you’d like to style.
You can do that by going to Posts > All Posts in your admin area, hovering over the title of the post you’d like to change, and then looking at the bottom of your browser at the URL that appears there.
Buried somewhere in that URL, you will see “post=XXX” – with the XXX here being some number. That number is your Post ID number.
In the example below, my Post ID is 100.
Insert Your Style into Stylesheet
Next, you’ll want to insert your style into your stylesheet.
Go to Appearance > Editor > Stylesheet – style.css. (If you’re using a custom CSS plugin, then insert your style there.)
Start by putting “#post-” and then the ID of your post. So, for example, mine would be #post-100. And then insert CSS brackets {}. You’ll put your new CSS code in the brackets where the comment /* YOUR STYLE HERE */ is.
#post-100 {

/* YOUR STYLE HERE */

}
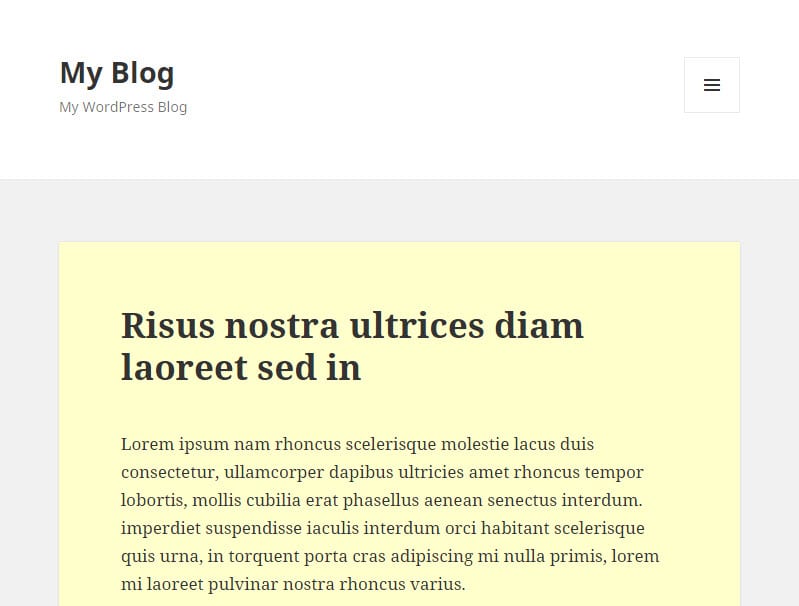
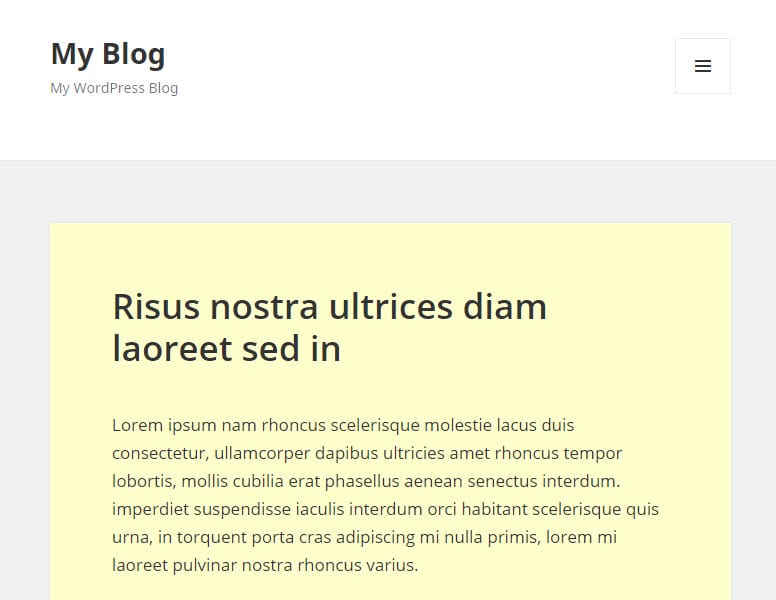
As a quick example, let’s change the background color of just one post (post-ID 100 in this case).
We’ll change it from a post with a white background to a post with a pale yellow background.
I’ll do that by adding the following code:
#post-100 {

background-color: #FFFFCC;

}
Here's the "Before" Look

Here's the "After" Look
Doing More
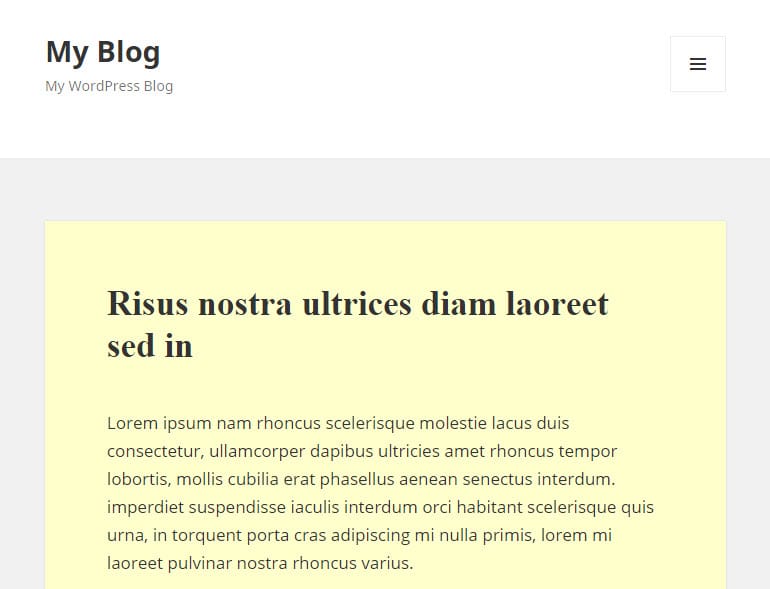
Let’s say I wanted to change the font on this post to Open Sans. I’d simply add that like this:
#post-100 {

background-color: #FFFFCC;

font-family: Open Sans;

}
And here's what that would look like.
But now let’s say I wanted to keep the Opens Sans font for the body of the text, but I wanted to make the title of the post in Times New Roman.
That gets a little trickier.
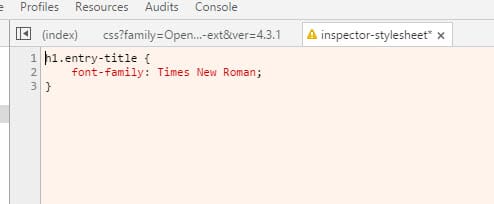
What I’d need to do is add a NEW section to my CSS file like the following. (Note: I have also kept the old section from above.)
#post-100 h1.entry-title {

font-family: Times New Roman;

}
You’ll notice that I have the #post-100 part as before, but then I had to add h1.entry-title before the CSS bracket. (More on this in a minute.)
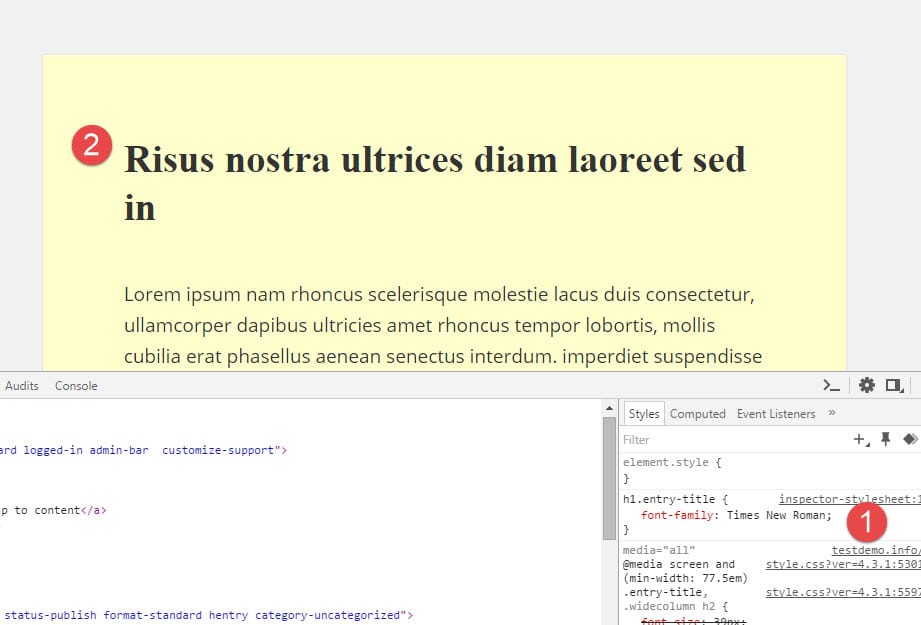
Here’s my post now with my yellow background, Open Sans body text, and Times New Roman title text.
Finding What CSS Elements to Change
In the code above I knew that I needed to change “h1.entry-title” because I looked it up via my browser. I know that Chrome and Firefox both have “inspect element” tools built into them. Other browsers might too.
To use them, do the following. (I’m using Chrome for this tutorial.)
- Click on what you'd like to inspect on your page. (In my case, it’s the title.)
- Right-click and then click “Inspect Element.”
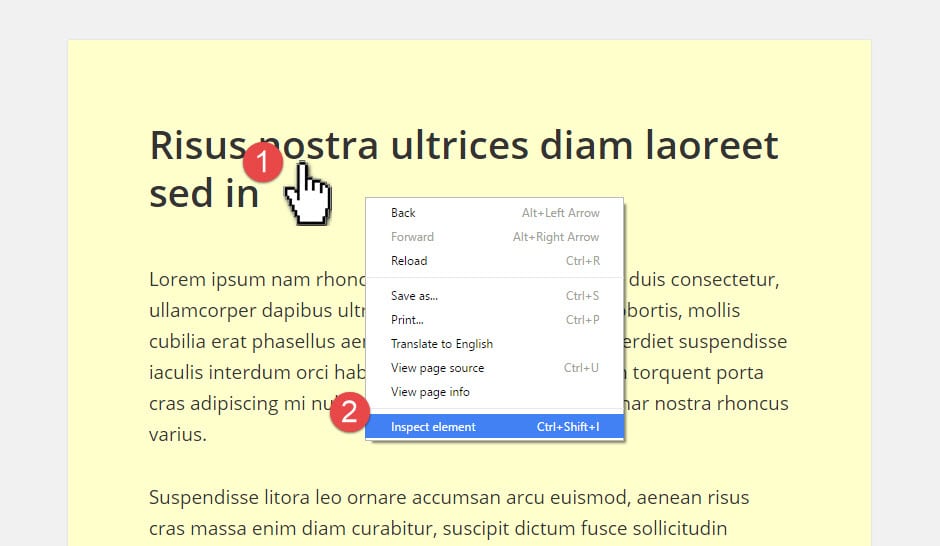
Once you click “Inspect Element,” a new panel will open either to the side of the page or on the bottom of the page. (You can switch the views around by dragging the panel to the position you like.)
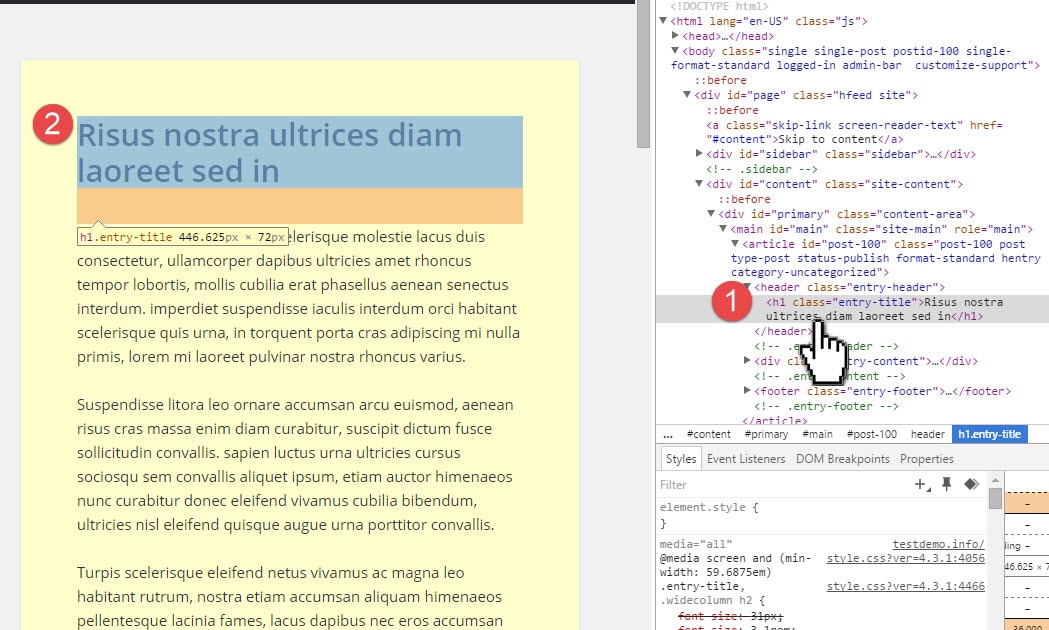
In the new panel, you should have some code already highlighted. This code pertains to the code that you selected on the page at the beginning.
When you hover over different codes in the code section, you should see what it refers to being highlighted on the page. You may have to hover over a few different sections to get the exact right piece of code you’re looking for. (Sometimes this code can get very complex, and you practically have to be a CSS expert to work it out, but with some practice, you can get a lot done on your own.)
Getting the Exact Right Code
To get the exact right code you’ll need (i.e. the “h1.entry-title” bit in my example above), if you click on the plus button (+) in the Styles section, it will create an instance of that code so that you can test it out right there in the browser.

You can then try out a new style right there, and see what it looks like immediately in the browser. (Note: This is not changing anything on your site. You need to put it in your stylesheet before it will do that.)
I’ve switched the code section to the bottom of the browser for this view.
If you’re happy with that, click on the link beside the code, and it will take you to a page where you can easily copy that code.
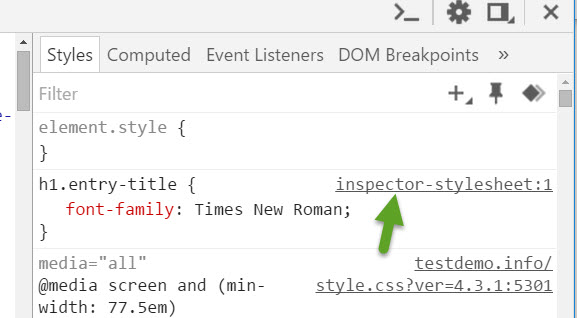
Here’s the pane where you can easily copy the code.
Giving More Posts the Same Style
If you’d like to give more posts the same style as the single post that you’ve styled, then you can simply add more Post IDs to your CSS code like this:
#post-100,#post-101,#post-124,#post-208  {

background-color: #FFFFCC;

font-family: Open Sans;

}
And that’s it. Pretty easy.
No Comments Yet