
If you’ve ever run across some useful WordPress code to put into your functions.php file, then there’s a good chance you might want to use that code again at some point on another site.
Did you know that you can easily turn that bit of code into a simple plugin so you can easily reuse it wherever you like?
Below we’ll go over exactly how to do that.
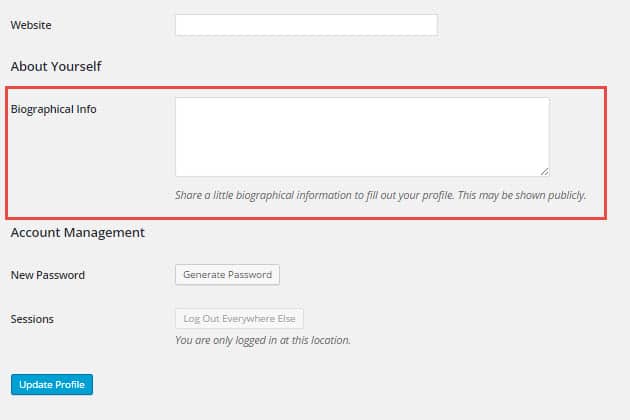
We’ll use a piece of code that removes the bio box on a user’s profile page. Here’s where the bio box is normally.
Inserting Header Information
The first thing you’ll need is a simple text editor like Notepad for Windows or TextEdit for Mac.
There will be only two basic parts to this: some header information and then the code itself (i.e. the code originally meant for your functions.php file).
Information that typically goes into the header space in a plugin is the following:
<?php

/*

Plugin Name: Name Of The Plugin

Plugin URI: http://URI_Of_Page_Describing_Plugin_and_Updates

Description: A brief description of the Plugin.

Version: The Plugin's Version Number, e.g.: 1.0

Author: Name Of The Plugin Author

Author URI: http://URI_Of_The_Plugin_Author

License: A "Slug" license name e.g. GPL2

*/
That’s fine for a “professional” plugin, but as you will only be using this for your purposes, you don’t need all that info.
All you need is the plugin name and a description of the plugin so that you can easily identify the plugin in your admin area.
And if you found the code you’ll be using somewhere on the web, you might want to put a link into the description (or in the Plugin URI spot) so that you know where it came from and can easily return there if needed.
Condensed Info Section
OK, so I’m going to make a condensed info section for my plugin.
At the top of the text editor, I put the following:
<?php

/*

Plugin Name: Remove Bio Box

Plugin URI: http://wordpress.stackexchange.com/questions/38819/how-to-remove-biography-from-user-profile-admin-page

Description: Removes the bio box found on user’s profile page

*/
So I gave it a name.
I put in the link where I found the code.
And then I gave it a description.
Insert Code Below Header Info
Next, simply paste the code you’re going to use below the header info. In my case, it’s the following:
add_action( 'personal_options', array ( 'T5_Hide_Profile_Bio_Box', 'start' ) );

/**

* Captures the part with the biobox in an output buffer and removes it.

*

* @author Thomas Scholz, <[email protected]>

*

*/

class T5_Hide_Profile_Bio_Box

{

/**

* Called on 'personal_options'.

*

* @return void

*/

public static function start()

{

$action = ( IS_PROFILE_PAGE ? 'show' : 'edit' ) . '_user_profile';

add_action( $action, array ( __CLASS__, 'stop' ) );

ob_start();

}

/**

* Strips the bio box from the buffered content.

*

* @return void

*/

public static function stop()

{

$html = ob_get_contents();

ob_end_clean();

// remove the headline

$headline = __( IS_PROFILE_PAGE ? 'About Yourself' : 'About the user' );

$html = str_replace( '

' . $headline . '

', '', $html );

// remove the table row

$html = preg_replace( '~

\s*

~imsUu', '', $html );

print $html;

}

}
original code
Saving the File
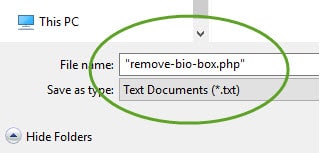
You’ll need to give your file a name and save it with a .php extension at the end.
For those using Notepad in Windows, to do this, you’ll need to put the whole name inside of quotations marks before saving it, or else it won’t save as a PHP file.
Mine looked like this as I was saving it.
Zip the File
Next, you’ll want to simply zip the file you’ve just saved. You can usually do this by right-clicking.
(Note: Don’t put the file in a folder before zipping it. Simply zip the file itself.)
Upload and Activate
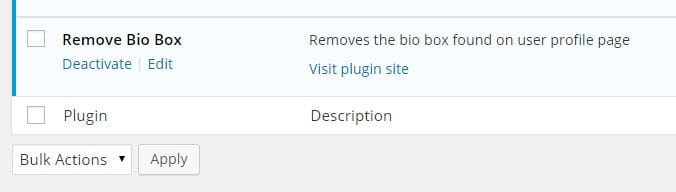
Next, simply upload your plugin and activate it as you would any other plugin.
Here’s how mine looks in the admin area.
And here’s it is in action. First, remember the old bio box.
Now with the plugin activated, the bio box is gone.
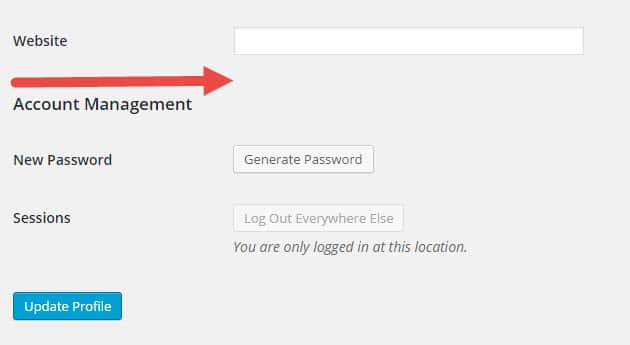
And that's it, a simple plugin that you can install into any site you like.
No Comments Yet