
Introduction
Demo Awesome - the data importer plugin helps you to start with your new project within minutes. With this plugin and its many prebuilt demos, you can start building new modern blogs, magazines, e-shops, personal pages, or any other website niches. Follow the simple instructions below to learn more about how to import a new demo content including theme settings, menus, widgets, posts, and pages, sliders, which will simplify the development of the website and give you great ideas to build outstanding sites based on WordPress.
Installation
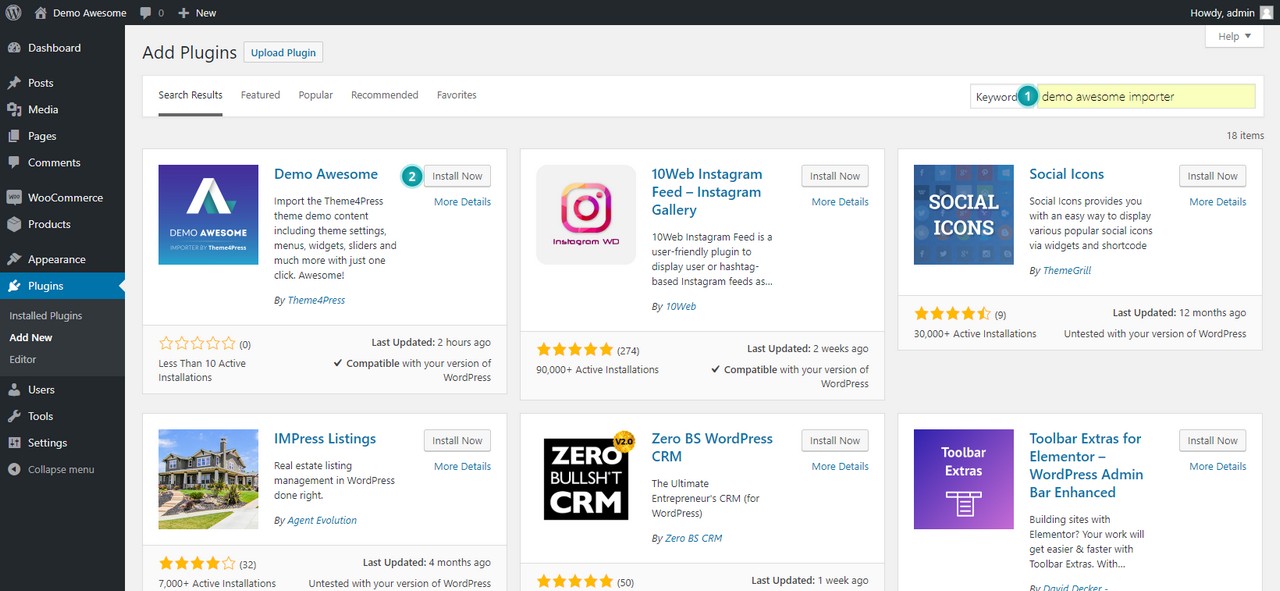
a) Install the plugin through the WordPress plugins page by searching the Demo Awesome Importer term - 1 and clicking the Install Now button - 2.
b) If you downloaded the plugin manually through the plugin page, upload the demo-awesome plugin folder (unzipped) to the /wp-content/plugins/ directory of your WordPress installation.
To learn more about how to upload files to the plugins directory, please learn more about cPanel uploads here and uploads through an FTP program here. Please note that you need to upload the plugin files to the plugins folder of your WordPress installation.
Once you install/upload the plugin, please activate it through the Plugins menu in WordPress.
Import a Demo
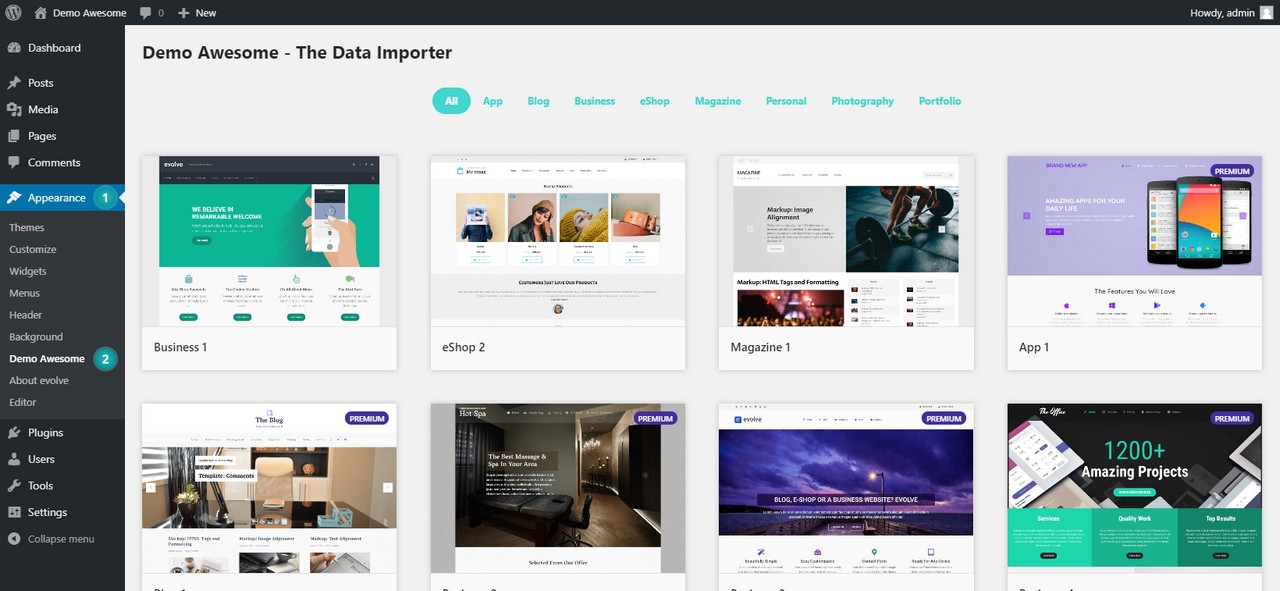
Once you successfully installed the plugin you can start to import the demos by visiting Appearance Demo Awesome. On this page, you will get the list of all available demos for import. Click on a demo you wish to import.
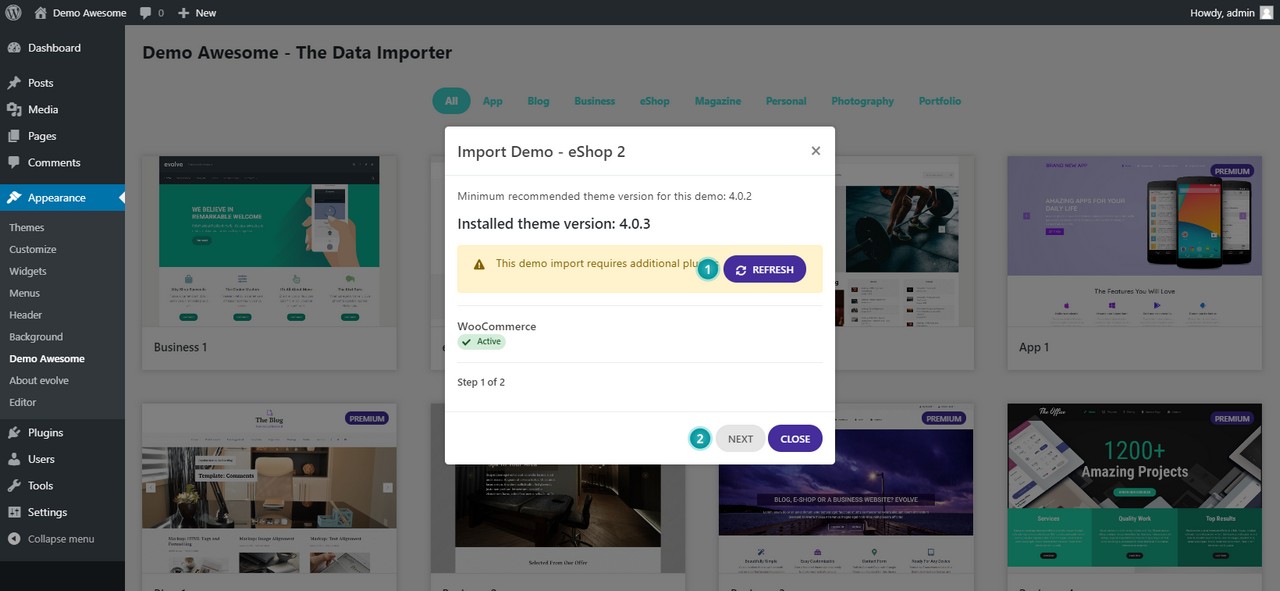
Install Required Plugins
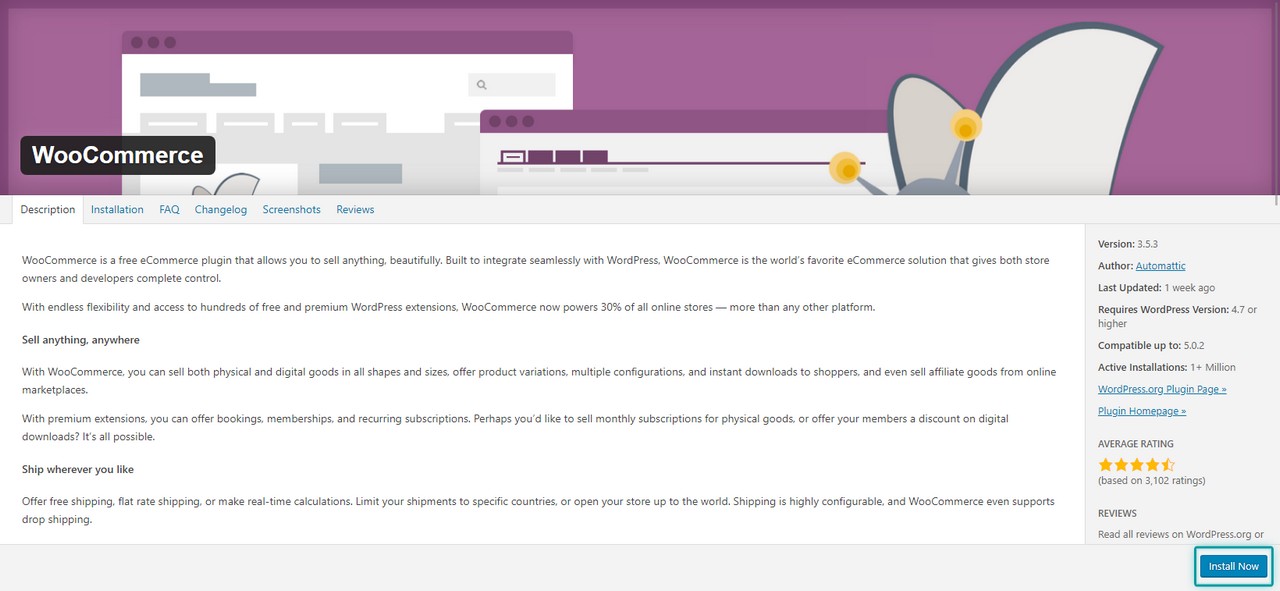
Some demos may require installing additional plugins to import the demo data correctly. You can decide to install them directly through the Install button in the popup window or continue the import without installed plugins. It's always highly recommended to install the required plugins as it will always import the complete demo data as shown in the preview window of the respective demo.

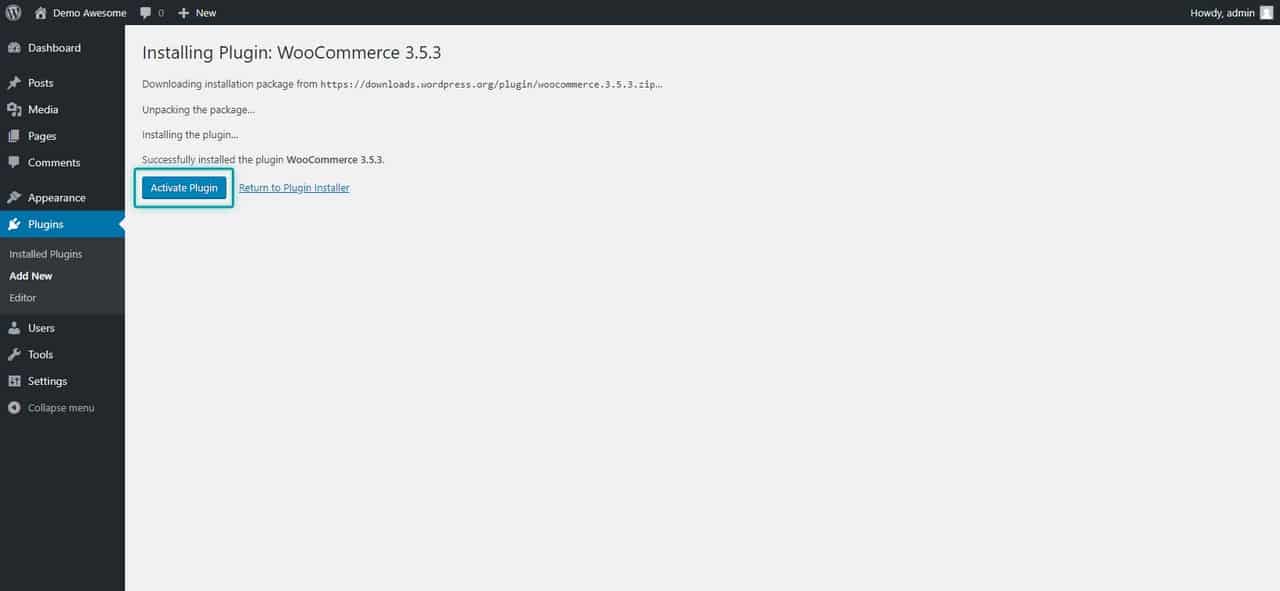
On the plugin details page simply click on the Install Now button and proceed with the installation process. Once complete, activate the plugin by clicking the Activate Plugin button.
Begin Import
To confirm the newly installed plugin is active, hit the Refresh button to make sure it's active - 1 and the demo is ready with all required plugins to be imported. If all required plugins are installed and active, you can click on the Next button to continue with the import - 2.
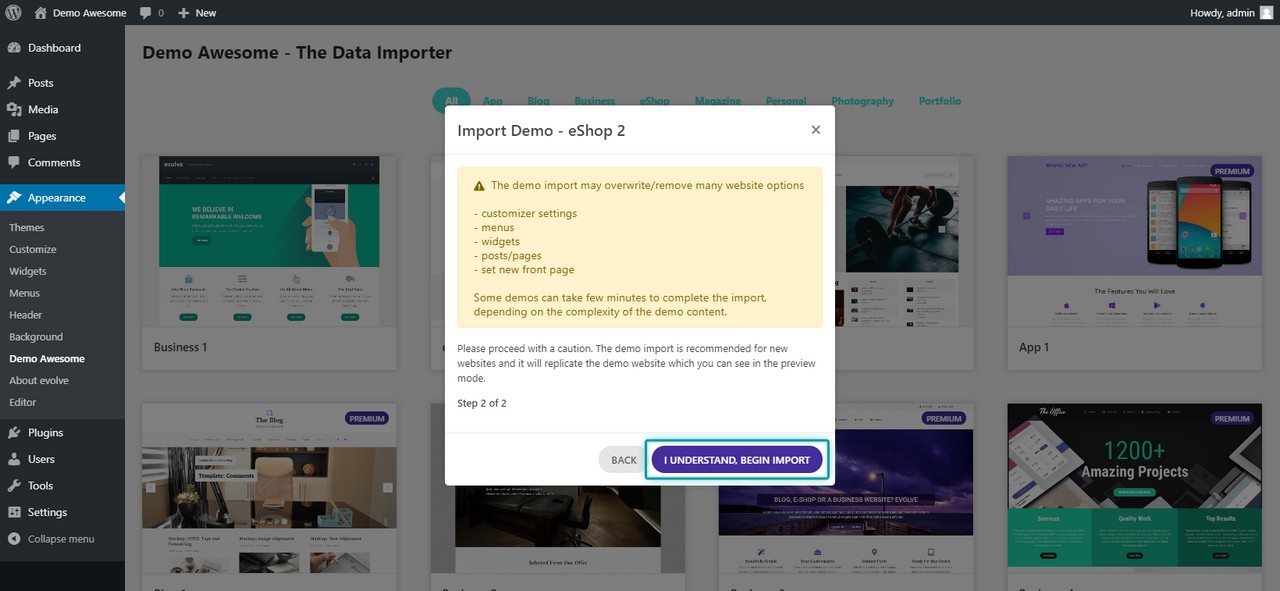
On the next window please make sure you have read all the notes about importing new demo content on your website. It's important to note that the data import can overwrite/modify/remove many existing website contents of your website. If all this info is clear, just hit the Begin Import button to proceed with the import.
Some demos may take a few minutes to complete the import, all depends on the amount and complexity of the imported content. Some demos can finish within a minute and some demos can take much longer. Please be patient till the popup window will display the import finished message. In this step you can continue by visiting the newly imported content - 1, customizing it - 2 or simply closing the information window - 3.
