Installation
There are essentially 3 different ways to install (or update) a Theme4Press theme:
- through the WordPress admin area of your site
- through cPanel/webserver interface
- via an FTP (File Transfer Protocol) client
Below are instructions for each method.
The easiest way is through the admin area of your site, and so we'll start with that method.
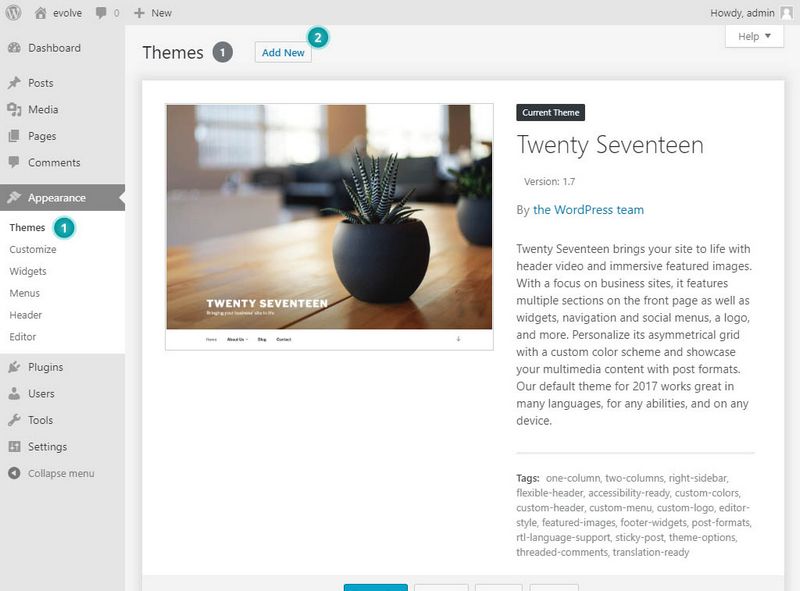
a) Installing Theme via WordPress Admin
After downloading the theme, go to Appearance Themes. Select Add New at the top.
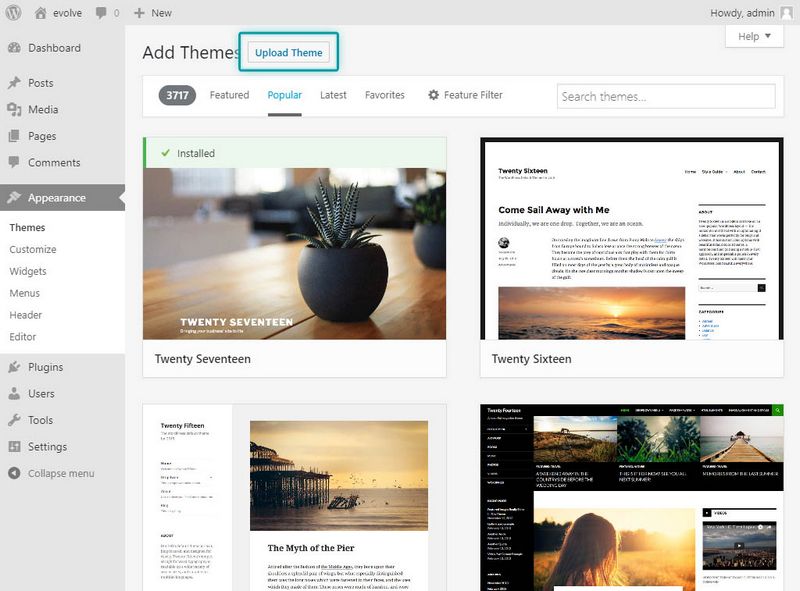
Select Upload Theme at the top, Browse and upload the zip file containing the theme. Then select Install Now. There is no need to unzip the theme.
b) Installing Theme Through cPanel
Another way to install a theme is through your cPanel account. Most hosts will give you a cPanel account; however, there is a chance that yours doesn’t. You may have a different system that is similar but not the same as cPanel.
Look for a way to access cPanel through your main account page at your web host. Your username password for your cPanel account may be different from the username and password you have to access the WordPress admin area of your website.
NOTE: Your cPanel account may not look exactly like the images here, but it should be at least somewhat similar.
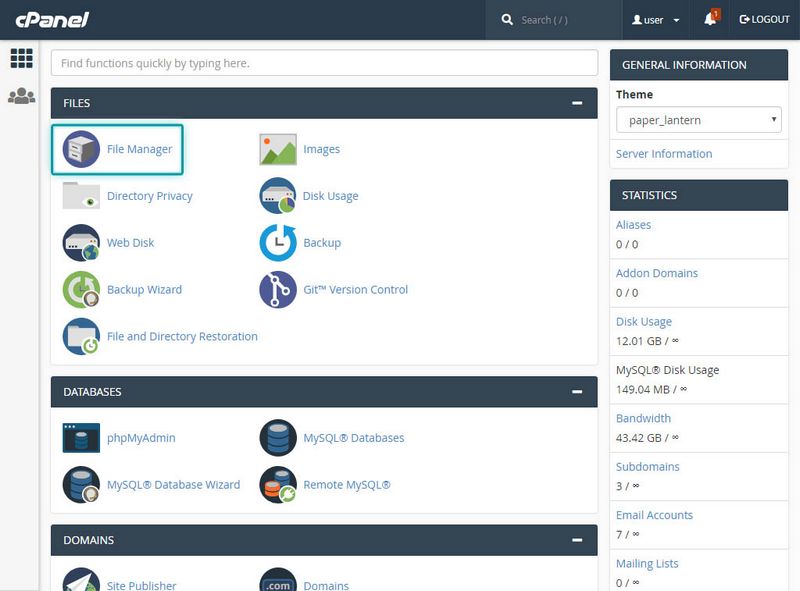
Once you’re logged into your cPanel account, find the File Manager link and click on that.
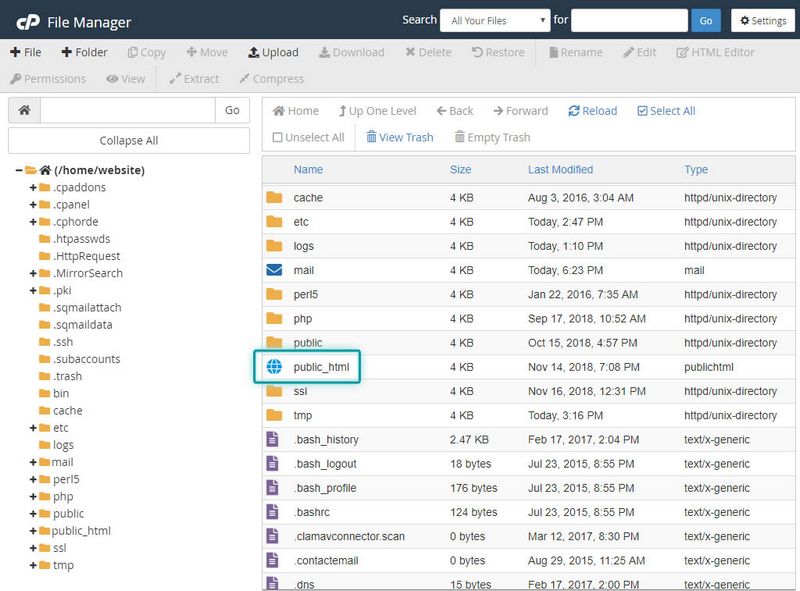
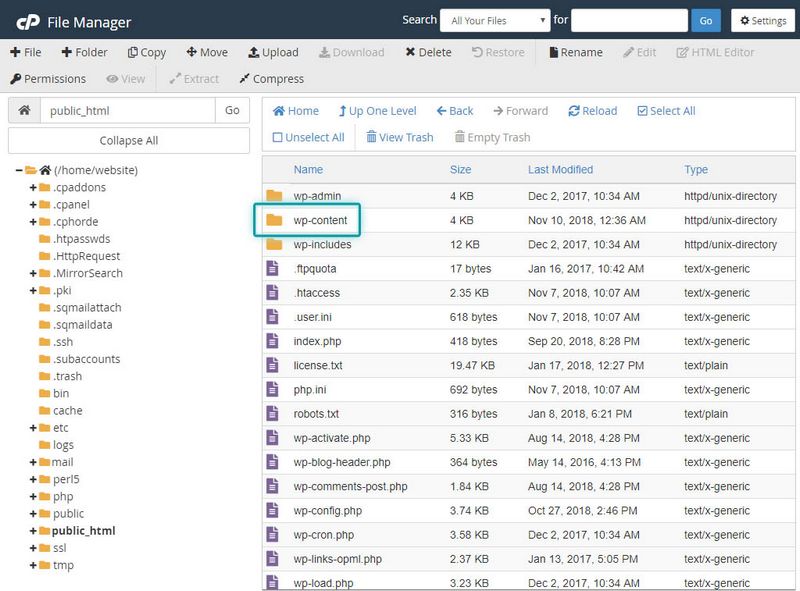
When you click on the File Manager link, you should be redirected to the directory screen like the one below. On the screen go to your public_html folder.
Once you’re inside your public_html section, find your wp_content folder and click on that.
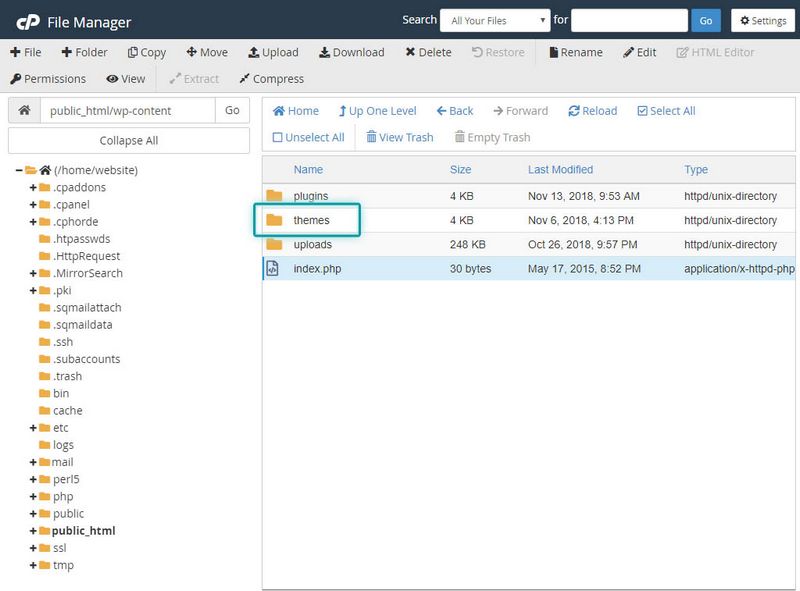
On the next page, click on the themes folder.
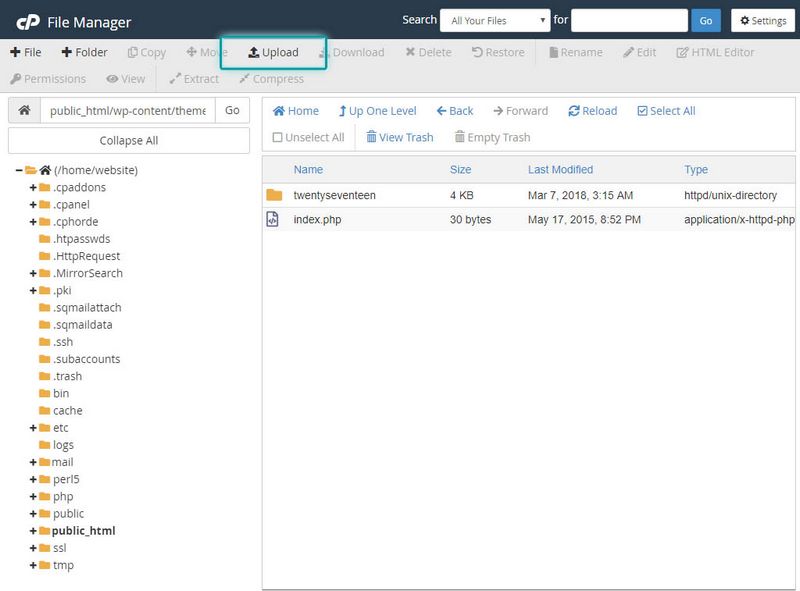
On the next page, you’ll see the folders of themes already installed on your site. At the top of the page, click on the Upload link.
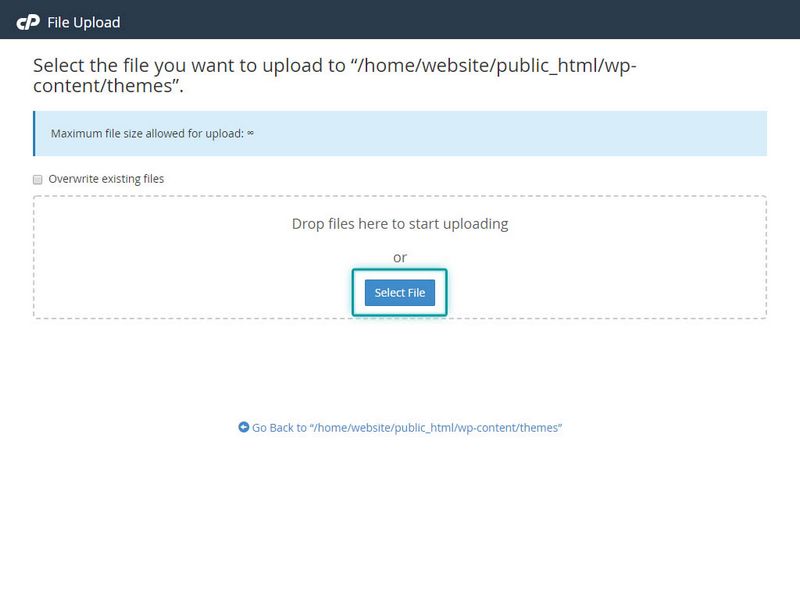
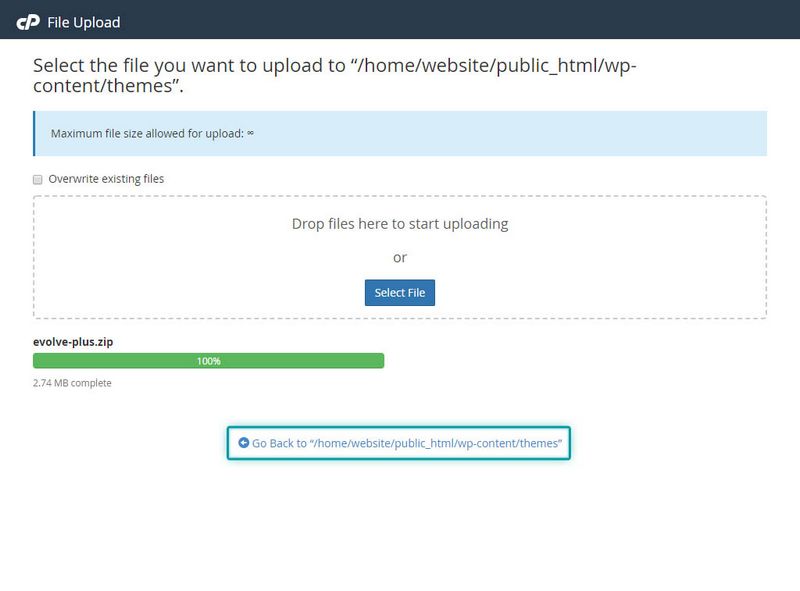
On the next page, click the Select File button. Then navigate to the zipped theme file on your computer, and upload it.
At the bottom of the page, you should soon see that your upload is complete. You will also see a link in the middle of the page telling you to Go Back to… Click that link.
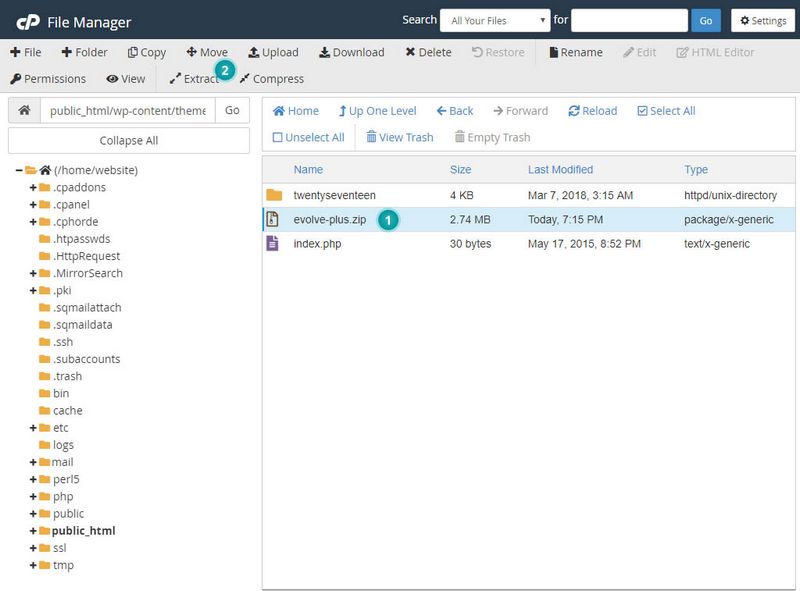
Back in the themes directory, you should now see the folder of the theme you’ve just uploaded. It will be zipped. Select that file, and then at the top of the page, click on the Extract link.
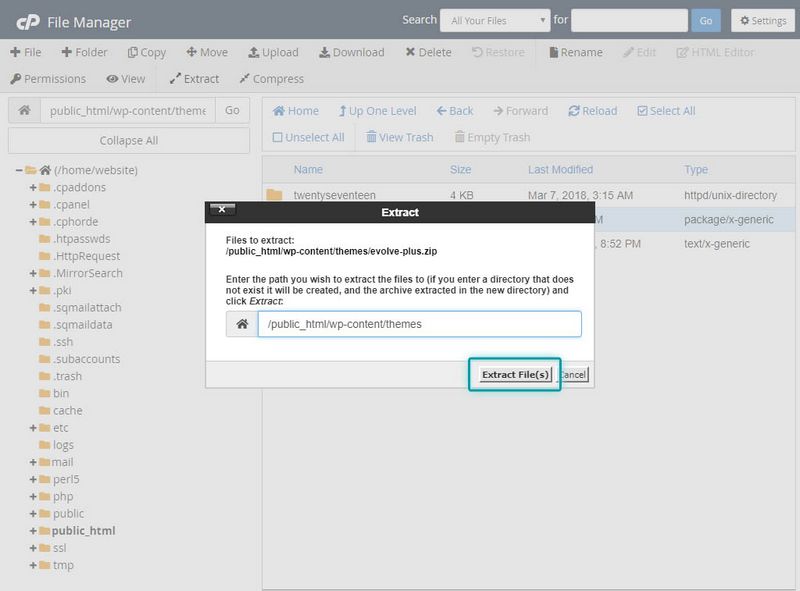
You will get a popup that asks you to extract the files, so just click the Extract File(s) button. When it’s done extracting the files, click the Close button that pops up.
Now you can click Reload link at the top of the section.

You will see that your theme has been extracted and now exists in an unzipped form. You can delete the zipped form of the theme if you like.

c) Installing Theme via an FTP Program
A slightly more complicated way to install a theme is with an FTP client. If you don’t have an FTP program, Filezilla is a popular free one.
The first thing you’ll want to do is to unzip your theme file on your computer. If needed, you can find free programs on the web to do this. However, your computer may already allow you to do this.
Next, you’ll want to log into your site’s server using your FTP program. You’ll need to fill out 4 fields of information.
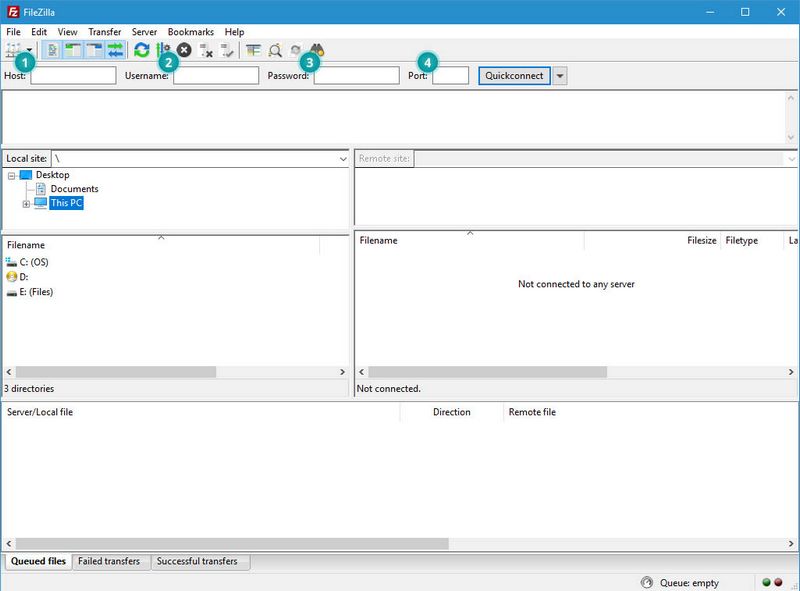
- Host – for example, website.com
- Username – usually same as cPanel username
- Password – usually same as cPanel password
- Port – 22 for secured connection, 21 for unsecured
Contact your web host if the above doesn’t work for you.
Navigate to your unzipped theme folder on your computer. This will be on the left side of the FTP program. Next, navigate to your theme folder on your server. This will be on the right side of the FTP program. The path should be similar to home website public_html wp-content themes
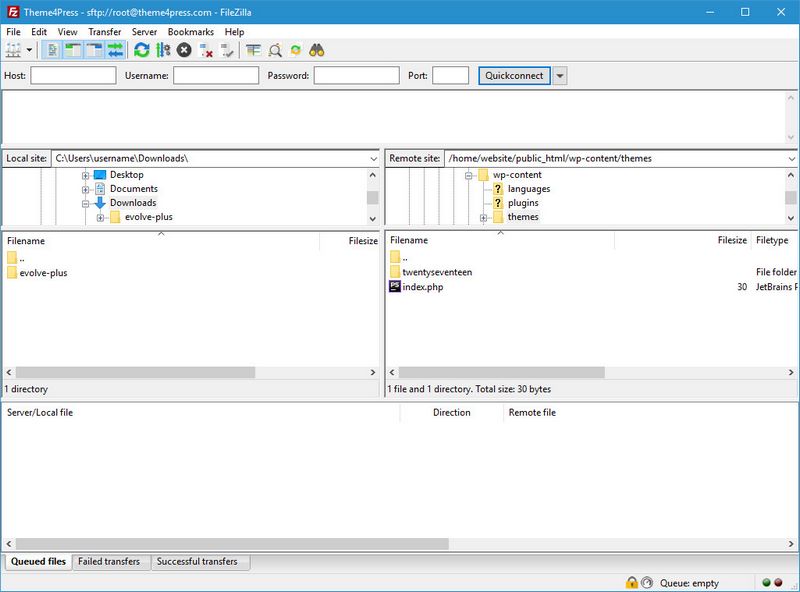
Once you’re in the theme folder on your server, simply drag your theme folder from the left side of the FTP client (i.e. from your computer) over to the right side of the FTP client (i.e. onto your server).
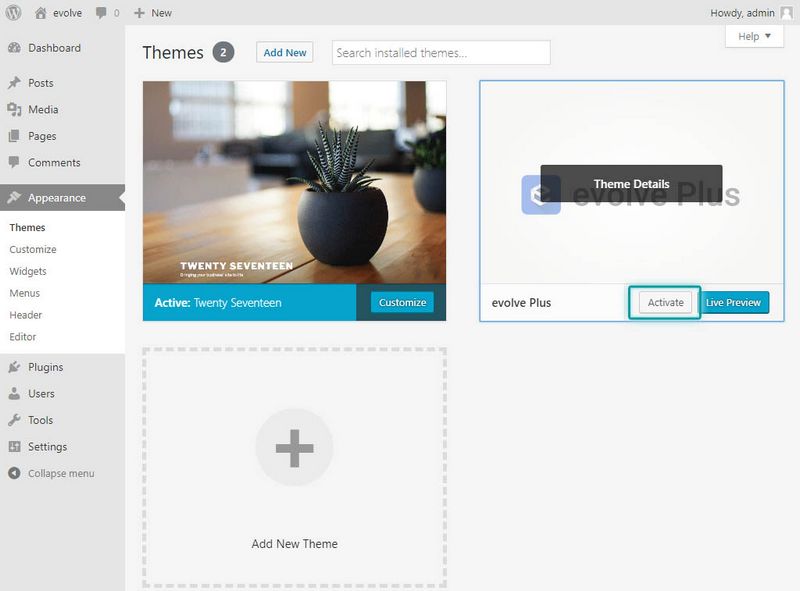
Activating Theme
Once your theme is uploaded, you will then see the option to Activate it.
Updating Theme
There are 4 ways to update a theme.
API KEY
The best and the easiest way to update Evolve+ is to create an API key, which will enable you to update the theme the way you would update a plugin - with one keystroke, without ever leaving your WordPress admin area.
In your Membership Area on theme4press.com navigate to KEYS and generate an API Key. You can generate as many as you want, and there is a field called Description, where you can enter some free text, that will help you remember where you used this particular key (for example, website address).

Once done, go to your WordPress admin, Appearance -> Customize

Paste the API key and click PUBLISH. That's it. Once an update is available, WordPress will let you know that you can update the theme.
If for some reason you prefer the old ways, here they are:
a) Update Theme Through WordPress Admin
Updating your theme through the WordPress admin area is also the easiest way to update.
To update your Theme4Press theme, simply install a backup plugin, which will help you to revert to the current version of the theme, if something went wrong. For example UpdraftPlus WordPress Backup plugin. After the backup, you can proceed to the update.
Navigate to the Appearance Themes and remove the current version of the theme.

Once the theme is successfully removed, you can continue to the install section.
b) Update Theme Through cPanel
To update your theme through cPanel, you will first rename the old theme. Because you’re doing that (and your site won’t recognize the new name), it might be a good idea to activate a different theme while you complete this process. You might also install a “maintenance” plugin so that visitors will get a message that your site will be back up shortly.
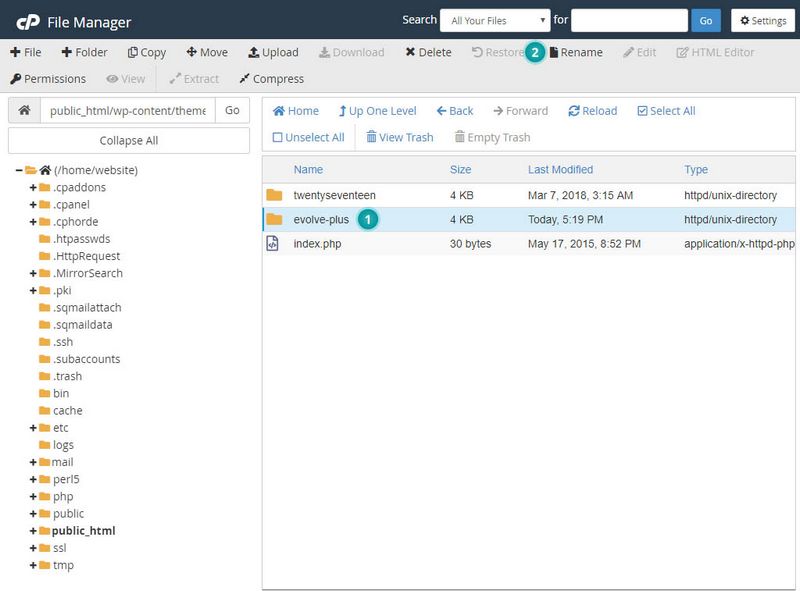
In cPanel, rename your theme by selecting the theme, and then hitting the Rename link at the top.
You can rename it whatever you want. You are simply renaming it so that you can easily put it back in place if needed. So you might just stick something like “old” at the end of the name.

Once you have your theme renamed, upload the new version of the theme, and then install it as you would a brand new theme - see instructions in this section.
If you activated a different theme before, now go back and activate the newly updated theme. Once you are confident that everything updated correctly and the new version is working well, you can delete the old version of the theme.
If something did not go right with the update, you can delete the newly updated version of the theme, and then go back and rename the old version so that you can continue to use it while you figure out why the new version didn’t update correctly.
c) Update Theme With an FTP Client
To update your theme via an FTP client, you will first rename the old theme. Because you’re doing that (and your site won’t recognize the new name), it might be a good idea to activate a different theme while you complete this process. You might also install a “maintenance” plugin so that visitors will get a message that your site will be back up shortly.
In the right panel of your FTP client (i.e. on your server), rename your theme by selecting the theme, right-clicking, and then selecting Rename.
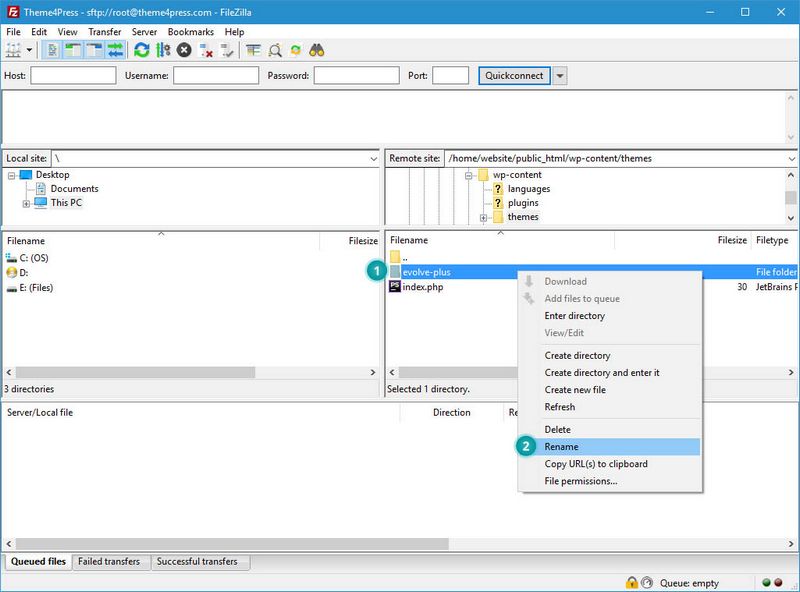
You can rename it whatever you want. You are simply renaming it so that you can easily put it back in place if needed. So you might just stick something like “old” at the end of the name.
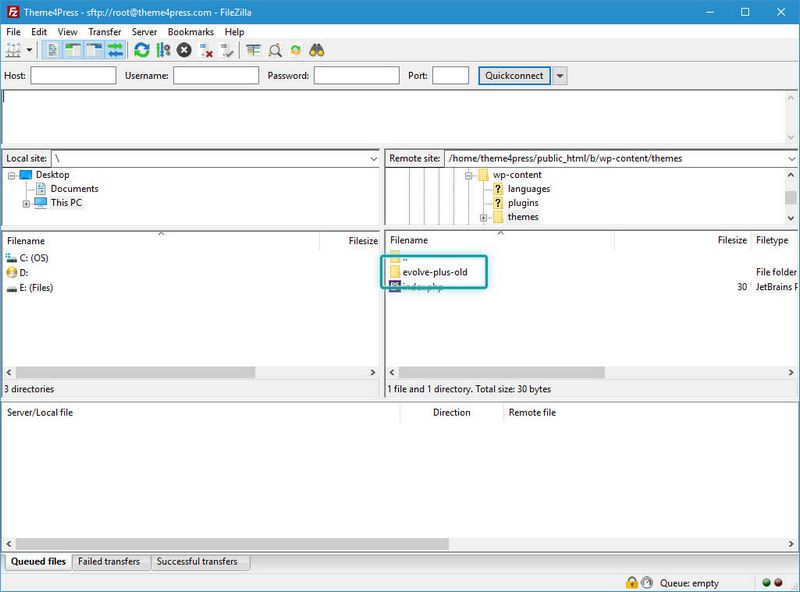
Next, simply upload the new version of the theme as you would a brand new theme - see instructions in this section.
If you activated a different theme before, now go back and activate the newly updated theme. Once you are confident that everything updated correctly and the new version is working well, you can delete the old version of the theme.
If something did not go right with the update, you can delete the newly updated version of the theme, and then go back and rename the old version so that you can continue to use it while you figure out why the new version didn’t update correctly.
Video Tutorials
Installing theme via WordPress admin
Installing theme through cPanel
Installing theme via an FTP client
Update theme through WordPress admin
Update theme with an FTP client
Knowledge Base
Common Installation and Update Errors
Please see our Knowledge Base if you experience any of the following common installation errors:
- Are You Sure You Want To Do This error message
- Please Try Again error message
- PHP Warning: is_readable(): error message
- A blank or white page after installing via File Transfer Protocol (FTP)
Less Common Installation and Update Errors
- Parse error: syntax error, unexpected ‘function’ (T_FUNCTION) in the wp-content folder error message. This error is seen after installing via FTP. [/li_item]
- 500 Internal Server Error error message. Please contact your systems administrator as it most likely is an error on your server or web host's end.
If this occurs remove the version and download it again, upload it, and activate. If it happens again try this: in FileZilla go to Transfer Transfer Type and choose Binary (note: these steps are for version 3.10.2). Then close Filezilla and open it again (restart). Then try to copy the theme unzipped files again.
Contacting Us
Please make a post in our forums stating which version of WordPress you have (found in the top right or left under W), exactly what you did before you had the problem, and a description of the current problem. Any screenshots would be helpful. Here are the instructions to take screen-shots. You can use a picture service like prntscr.com to provide links to the pictures.